
With our daughter’s first birthday rapidly approaching, I started to get more aggressive on my search for the perfect mobile growth chart. Mobile in the sense that we could easily relocate the chart as our family moves from home to home. There came in Etsy, where I discovered the Little Acorns by Ro store.
Little Acorns by Ro has beautiful wooden height marker rulers…or so that’s what I initially thought. Until I started to browse the store and actually discovered the stores sells vinyl transfer decals, customized in the colors, monograms, names, etc. that you choose. And, you build the height marker ruler yourself!
Ordering the Custom Vinyl Decals
 My husband’s very handy, so I proceeded to order decals to make our own ruler (black left-side, 1″ marks with large traditional numbers, a black custom monogram for the top of our ruler with the date our family started (our wedding year), a black “loved beyond measure” saying for the bottom of the ruler, slate / dark gray “mom” and “dad” height decals with a feathered arrow, lemon yellow birth-through-age-18 height decals for our little girl, and her name in lemon yellow for the legend too). The decals come in 23 color choices, so you can really customize your ruler how you’d like. The store also has metric, as well as right-side board, options. Some of the items, like the “mom” and “dad” marks, even let you choose your embellishment (maybe you’d rather have hearts or apples instead?).
You could always just use a permanent marker to record your child’s growth, but I opted for decals to match the look. I had a hard time deciding between the birth-through-age-18 height marks with monogram vs. the one’s I ultimately settled for, which offered us the option of using a color-coded legend. I was concerned if Eric and I were blessed with future children, what if there was that off-chance we repeated the same first initial? Perhaps you’re building your mobile growth chart after you already started recording height on the wall at home and now you are in the middle of a move and don’t want to lose those precious memories…well in that case, you don’t necessarily need to prepare for the “what if’s” or “what’s to come.”
The best part of these decals? You can TOTALLY customize your ruler in anyway you’d like to suit you and your growing family. Sketch out your design on a sheet of paper…so you know exactly what you need to order.
 Once your decals arrive (I had mine in hand five days post-order), you’ll get a back-and-front-of-a-page set of extremely detailed instructions, starting with purchasing and preparing your board for the decal application.
Purchase & Preparation of the Board
Eric and I chose an 8ft – 8″ x 1″ pine board, which we later cut down to 7ft. We could have gone a couple of inches shorter, and pushed our monogram at the top down a bit, so it “overlapped” with the ruler marks as seen in many of the example store photos, but 7ft was just an easy number to work with. Pro Tip: Measure your floor to ceiling height (and also the height of the wall from the top of your trim to the ceiling) so you know your finished product will fit just fine on the wall.
Next, we routed the edge of our board with a 3/8″ round over beading bit, so it wouldn’t have such “sharp” looking edges. Pro Tip: Note the width of your decals to make sure the routing will not impede space needed for adherence.
We used a single-coat pretreatment (Minwax Sanding Sealer) prior to the stain, to reduce the blotchy look that can occur when staining pine.
Last steps to prep our board, included application of two coats of Minwax Early American stain and three coats of satin Minwax Polycrylic Protective Finish, lightly sanding the board in between each completely dry coat.
Pro Tip: Don’t cut corners on the purchase and preparation of your board. Our later vinyl decal application went quickly because we put so much care and concern into the prepping of the board.
Installation of the Board
After the board was completely dry, a couple of days had passed, we hung the board on the wall. We used a Dremel tool to notch out recessed space for Hillman Fasteners (Keyhole Hangers) on the back of the board. The hardware sat 4″ apart and approximately 12″ down from the top of the board. This would allow us to hang the board securely on the wall and keep it straight. Pro Tip: double-check that your “favorite” part of the board is oriented in the direction you want before you apply the hanging hardware.
Two screws were put partway into wall anchors, as we wanted to ensure they didn’t later get easily pulled out of the drywall. Not because of the weight.
By hanging the board first, it allowed us to accurately measure out where 12″ started on the board from the floor. We noted this with a small pencil line on the left side of the board front.
We also measured from the floor to the screws in the wall for the exact height the ruler would need to hang in our future home(s), from the floor, in order to always keep the measurements accurate. This second measurement, we wrote on the back of the board, near the hanging hardware.


Vinyl Decal Application
Next up: time to adhere our decals.
The board was placed horizontally onto a flat surface for the decal application.
We started first with the inch ruler marks (which arrived in easy-to-apply 12″ strip lengths). We had already used the first 12″ pencil mark to continue to measure additional 12″ pencil marks up the board, reaching 6′. We cut the top two 1″ marks off the very last of the ruler marks in order to place them at one inch marks below the very first 12″ ruler mark. This was seen in some of the sample photos on the Etsy store and kept our board from abruptly starting at 12″.
Second, we applied the saying to the bottom of the board, and our family monogram to the top.
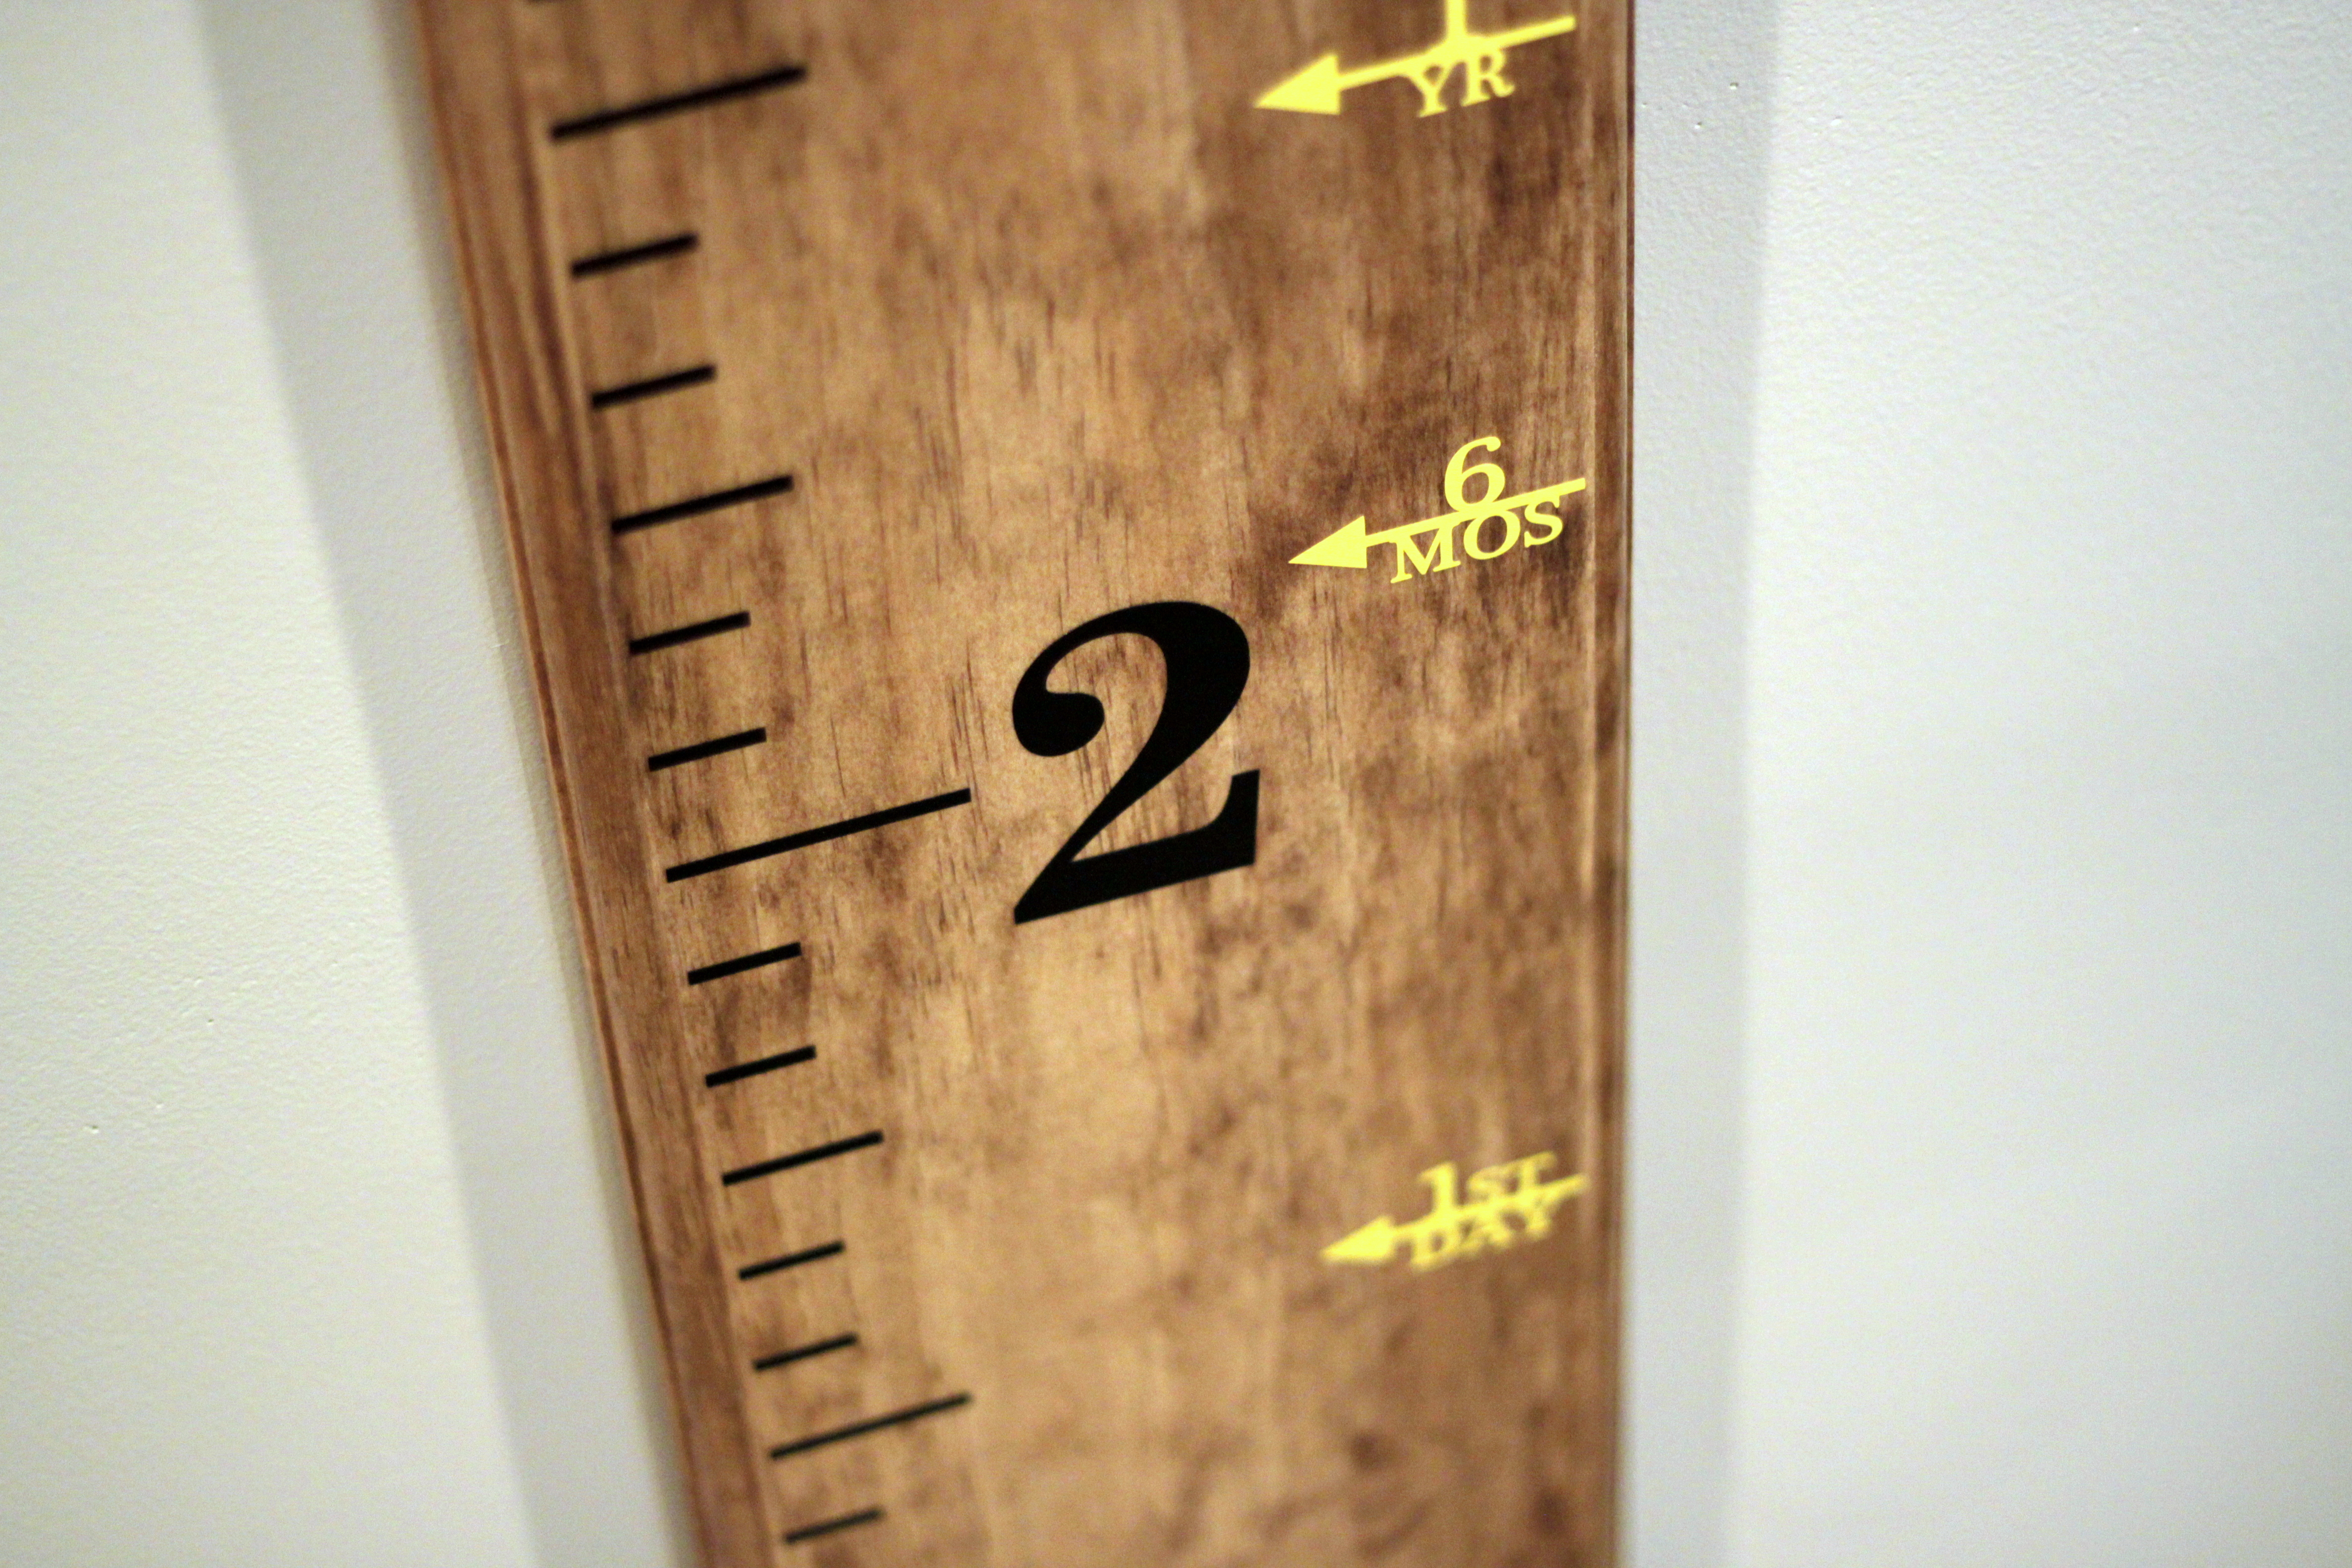
We then applied the large numbers at the 12″ marks. Note, you can optionally chose to lay your numbers horizontal or vertical, for added effect. Again, the choice is 100% up to you. Pro Tip: don’t assume that any of the decal transfer paper was cut with straight edges. You’ll have to do some fine-tune measuring and eyeball decals before you permanently press them onto your board. We discovered our “4” was originally placed a little crooked and carefully lifted that up to replace it with an X-Acto knife, but you may not be as lucky. Even after doing this, I realized because of the kerning on the “4” we probably could have brought it towards the ruler marks a hair, dropping some of the “white space.” It’s best to have one person line up the decals and another to inspect before they are pressed firmly into place. Also, a laser level comes in really handy for this step.
Once these “ruler” decals were on, we looked up our baby’s recorded birth and 6-month heights and applied her decals for those. The birth-through-age-18 decals come in a zipper-shut plastic pouch to keep them clean and flat for the years to come. There was also another small set of instructions there too, which will definitely come in handy when the full instructions are misplaced somewhere over the next 18 years (and through moves!).


Custom Decisions
Legend Placement
We decided to place the name legend at the top of our board to keep room for later children and because the bottom of the board was already rather “busy.”
Growth Decal Placement
We decided to apply the growth decals for her all the way to the right edge (with approximately the same “spacing” that you’ll naturally find between the 1″ marks and the left side of the board). We will later decide if we apply future children on that same edge or insert them a little so that they don’t overlap too much, especially when clumped together at the bottom of the board. (This was a drawback of going with any of the rather “tall” birth-through-age-18 decals). “Mom” and “dad” we took all the way left, nearly touching the 1″ marks, to not conflict with hers, and because we both happened to be on short ruler mark lines.
Colors
We selected our decal colors, because we’re in the middle of a basement redesign, in which our colors are: gray, white, black, tans, browns, wood-tones, and subtle and infrequent yellow accents. (More to come on that project too). The basement wood tone repeated in the board itself, with black primary decals, dark gray / slate for us, and lemon yellow, making for dark and bright enough choices to apply to our medium-toned board. Later children name colors could be in royal blue or teal. These colors will last for generations.
Done, For Now…
Once all the decals were applied, we rehung the board on the wall. And, now we anxiously await that first birthday!


Final Thought
This DIY, custom growth measurement chart RULES!
Feature Your Business
Would you like to see your business write-up on the Saving Amy blog? I’m always looking for new ideas. Please reach out.
Social Follow and Share
New post on my blog: Etsy Order + DIY Project: Creating Our Family’s Mobile Growth Chart https://t.co/K0sUYqH2Ca
— Saving Amy (@savingamyblog) October 18, 2016