
Long before our baby was walking, or even crawling for that matter, we installed baby safety gates at the top and bottom of our exposed second-floor stairwell in our home. Mainly this was in order to control where our pets roamed with a newborn in the house. Later, it became a way to corral the little one and with the built-in locking mechanism, a way to keep her safe near the stairs.
We opted for retractable gates, after seeing them in a neighbor’s home, since they were much slimmer than traditional baby gates. But, therein lied the problem…we really didn’t want to do anything to install the gates that we considered “permanent damage” to our stairway railing, in order to help sell the house intact some day.
We purchased two HomeSafe Retractable Gates from Bed, Bath & Beyond after online price-comparison shopping. There’s free shipping on orders over $29 and you can connect your phone number (learn more about which phone number I gave out) and email address to your account for a 20% off coupon each. We placed two separate orders to take advantage of both coupons. As of the writing of this post, these gates net a 4.2 out of 5 stars among reviewers on the Bed, Bath & Beyond web site.
Once the gates arrived, and we examined the parts in the box, we made a list of additional needed items from our local hardware store.
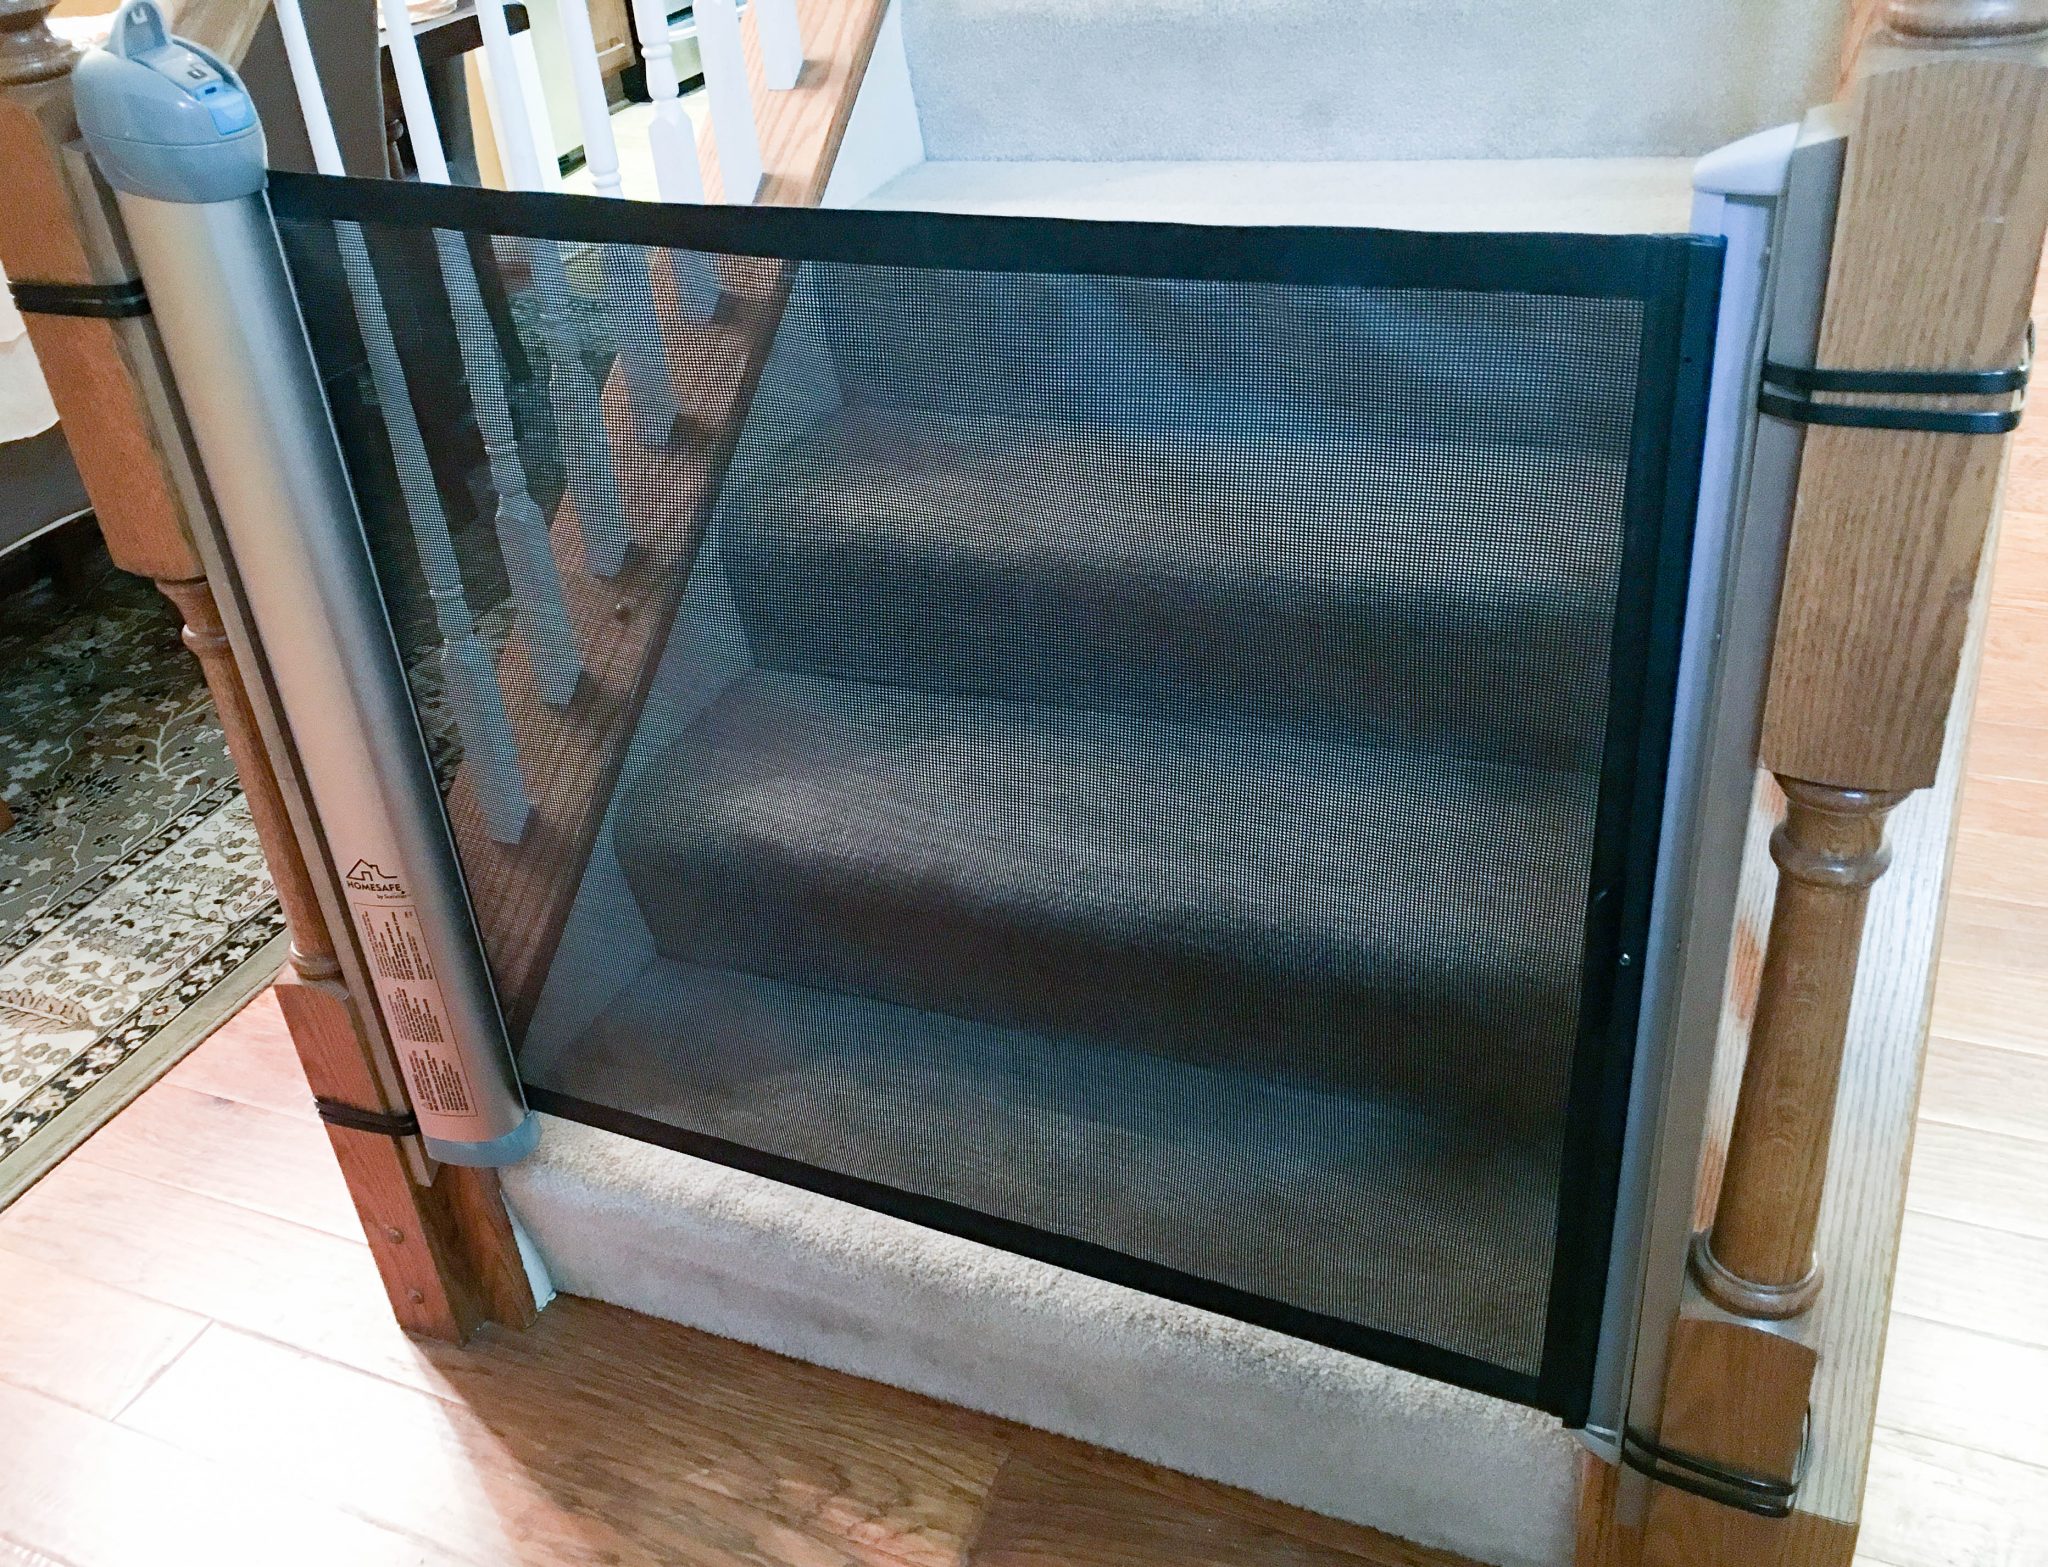
First item added to our shopping cart was: 1”x3”x8” poplar wood boards (product #1083 at Lowes). Returning home, we decided to angle cut the boards using our miter saw, to give a nicer look for the visible top end of the boards. Then we cloth-stained the wood to match the wood-tone of our railing, Natural Oak. Once two coats of stain was thoroughly dried, we then took 175-pound rated Utilitech cable ties (product #292682 at Lowes) and attached the boards tightly to the stair rail posts. This allowed us to fasten the retractable gates to the cable-tied boards instead of direct to the posts. We made sure to use wood screws with a depth that would stay within the thickness of the 1” board.
Slideshow:


For the gate at the bottom of the stairs, it was cable-tied boards on both sides. For the gate at the top of the stairs, only one side, as we had a drywall stud to mount on the opposing wall.
We also referenced a specific video on YouTube during our stairway post install:
Our gates have been installed nearly a year and a half now, and if we did it all over again, we would install the same style of gate. Hope this helps you through your baby gate decision.
Update on July 11, 2017: I recently came across a Banister Mounting Kit by Summer Infant to make this even easier for those of you that aren’t really DIY’ers and it’s not terribly priced either! Save yourself the shopping trip(s), time, and money…hope this is a better solution to meet your needs!
Saving Amy is a participant in the Amazon Services LLC Associates Program, an affiliate advertising program designed to provide a means for sites to earn advertising fees by advertising and linking to amazon.com.
Social Follow and Share