
![]() In 2015, when I was pregnant with my first due in November, I scoured the Google Photos library for a creative maternity Halloween costume. I knew I didn’t want to be the typical “pregnant nun” that seems to be the most common maternity costume that I’ve seen. I definitely wanted to go a different route. That lead me to being a hillbilly trucker with a beer belly. I raided my husband’s closet for a hat, flannel shirt, then wore my own elastic-waisted sweatpants and a non-maternity white tank that was way too small for me, used an empty beer can for a prop and purchased trucker hair and ‘stache from Party City. It was a rather inexpensive getup. I got induced just 9 days later…that’s how pregnant I was.
In 2015, when I was pregnant with my first due in November, I scoured the Google Photos library for a creative maternity Halloween costume. I knew I didn’t want to be the typical “pregnant nun” that seems to be the most common maternity costume that I’ve seen. I definitely wanted to go a different route. That lead me to being a hillbilly trucker with a beer belly. I raided my husband’s closet for a hat, flannel shirt, then wore my own elastic-waisted sweatpants and a non-maternity white tank that was way too small for me, used an empty beer can for a prop and purchased trucker hair and ‘stache from Party City. It was a rather inexpensive getup. I got induced just 9 days later…that’s how pregnant I was.
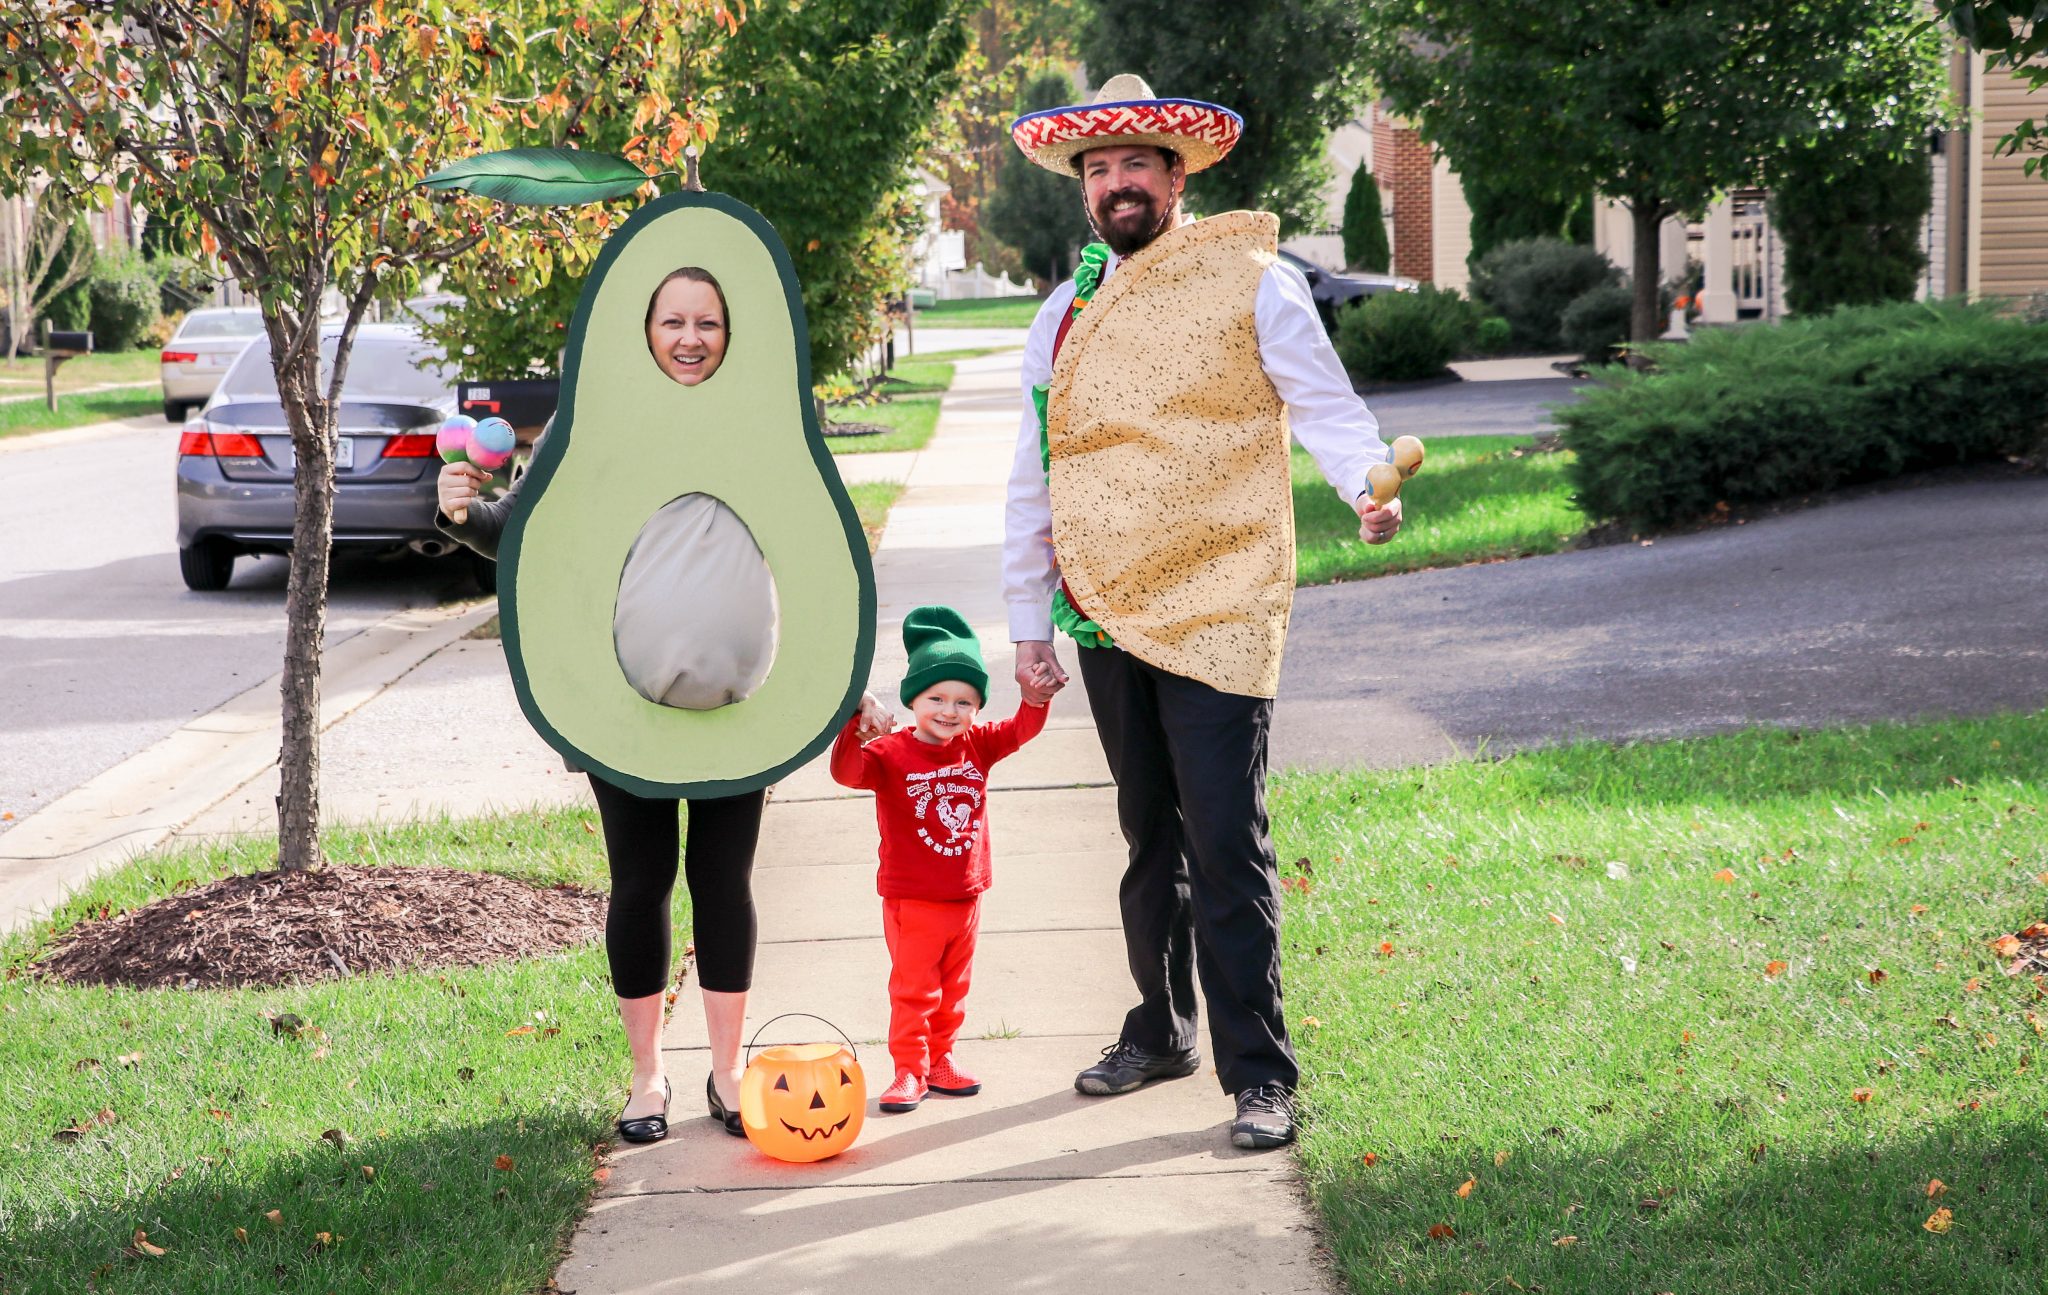
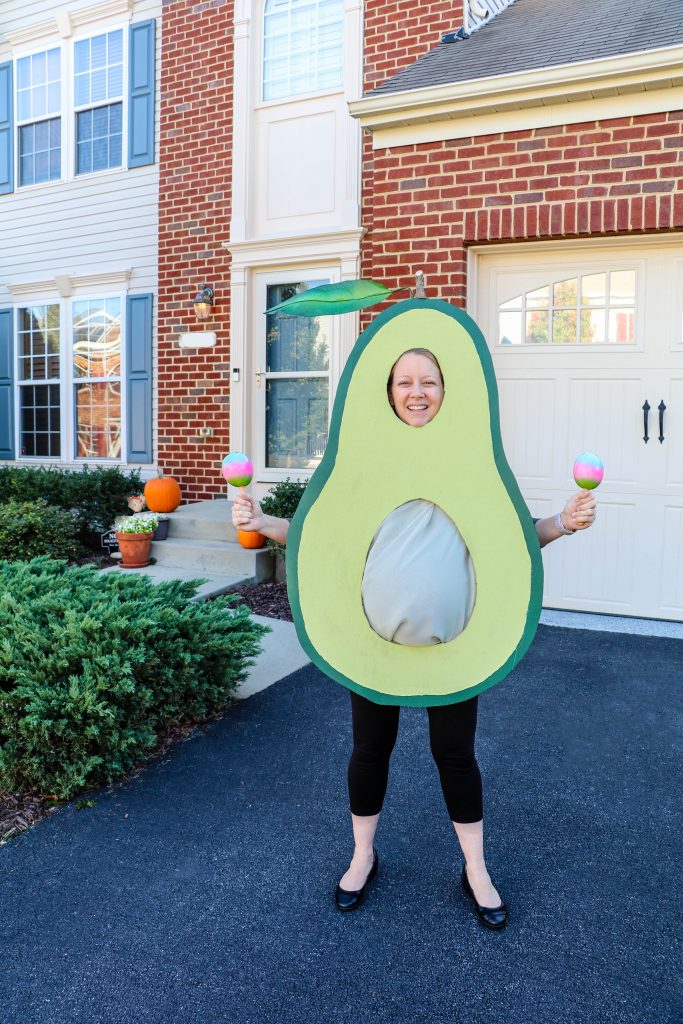
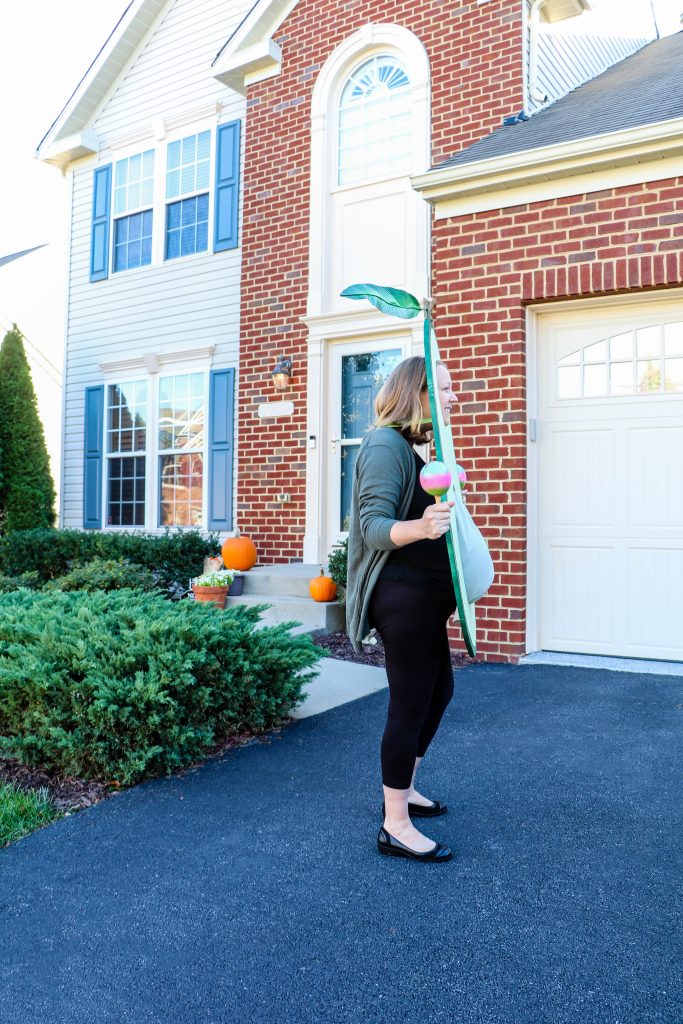
Well, this year, I’m due the same time of the year and the baby is already skewing 3-weeks ahead of schedule, so I’m going to have a monster belly come Halloween (pun intended). I, again, wanted to be something different. Which lead me to ask the other expectant moms, in the “Due November 2017” Facebook group that I’m in, for ideas. One of them mentioned this awesome idea of using my belly as an avocado seed.
The following is a step-by-step guide to the making of my 2017 DIY maternity Halloween costume. Hope this helps you in making yours!
Supplies (with Products Hyperlinked Where Possible):
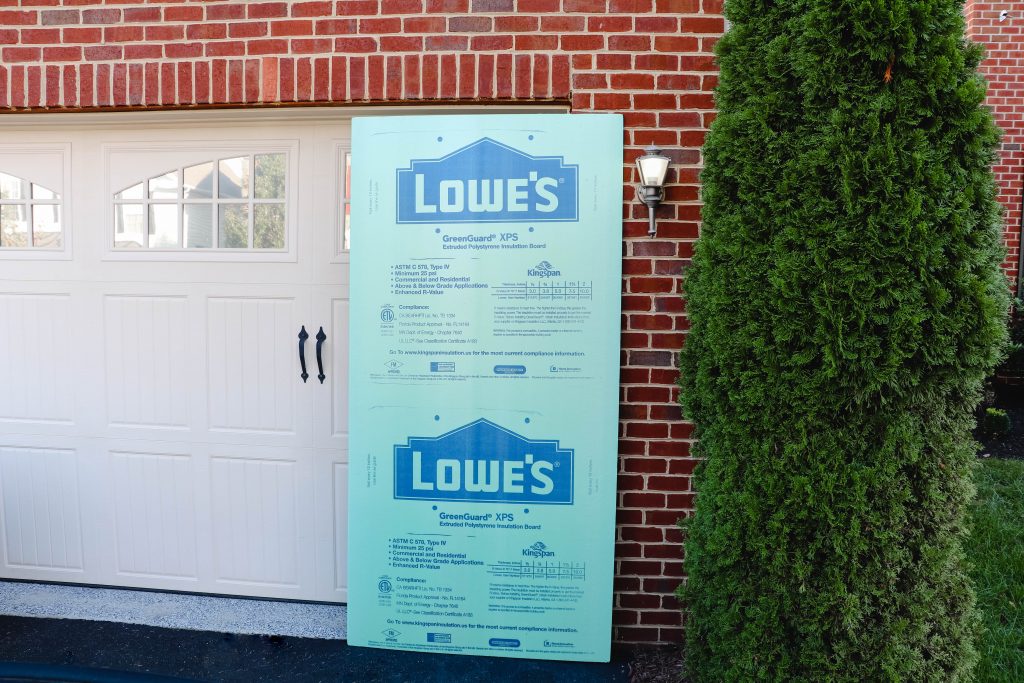
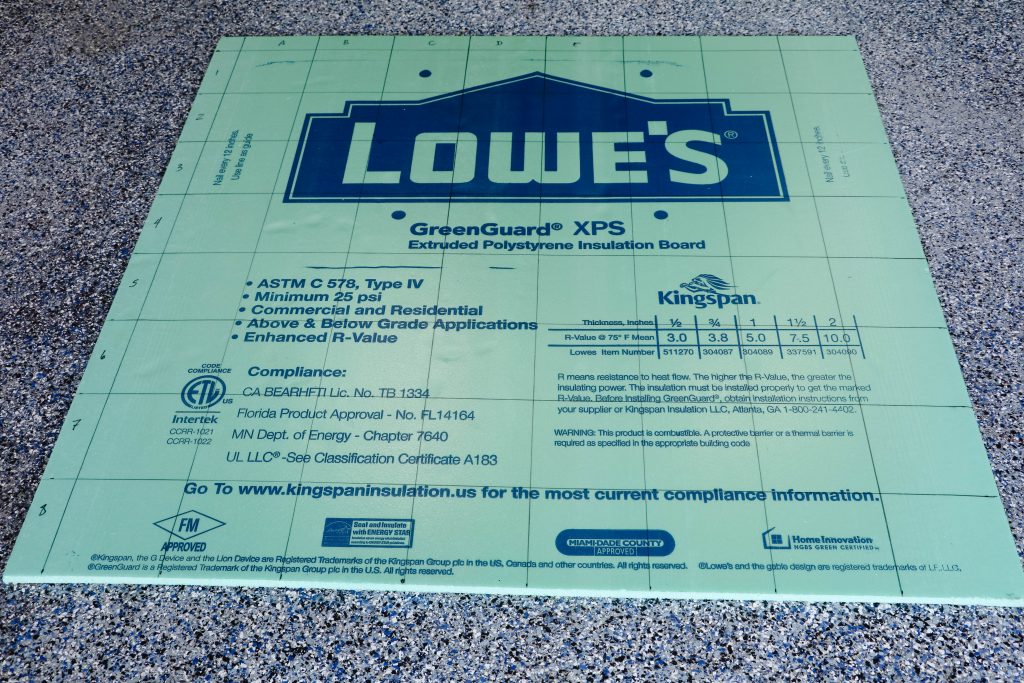
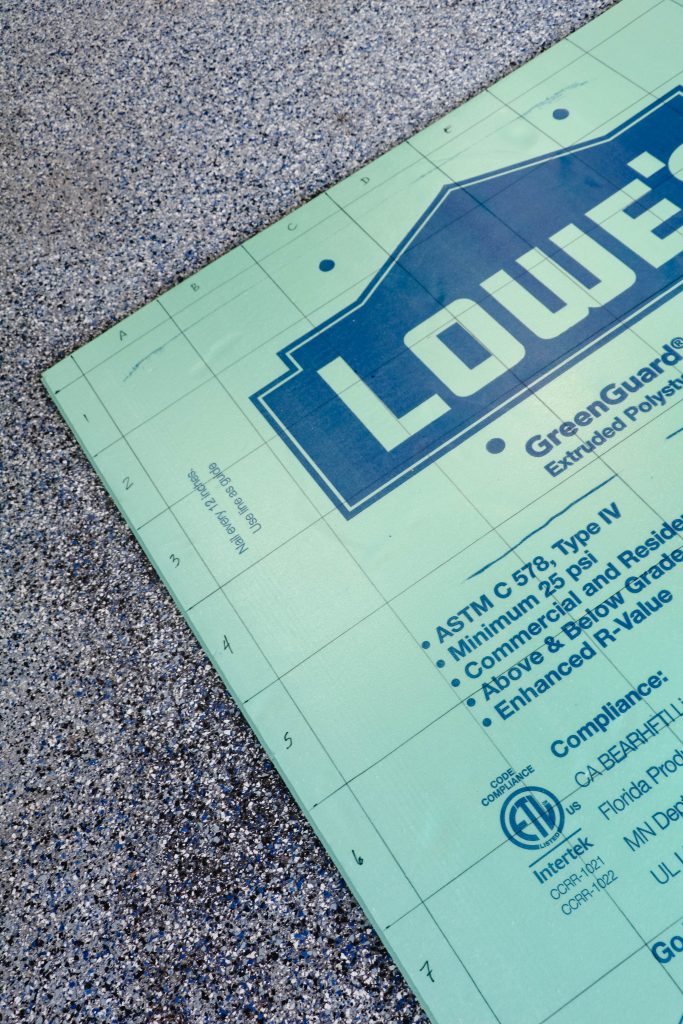
- 1/2″ x 4′ x 8′ Foam Board Insulation (Item # 511270 Model # L48056LOWES): Lowe’s
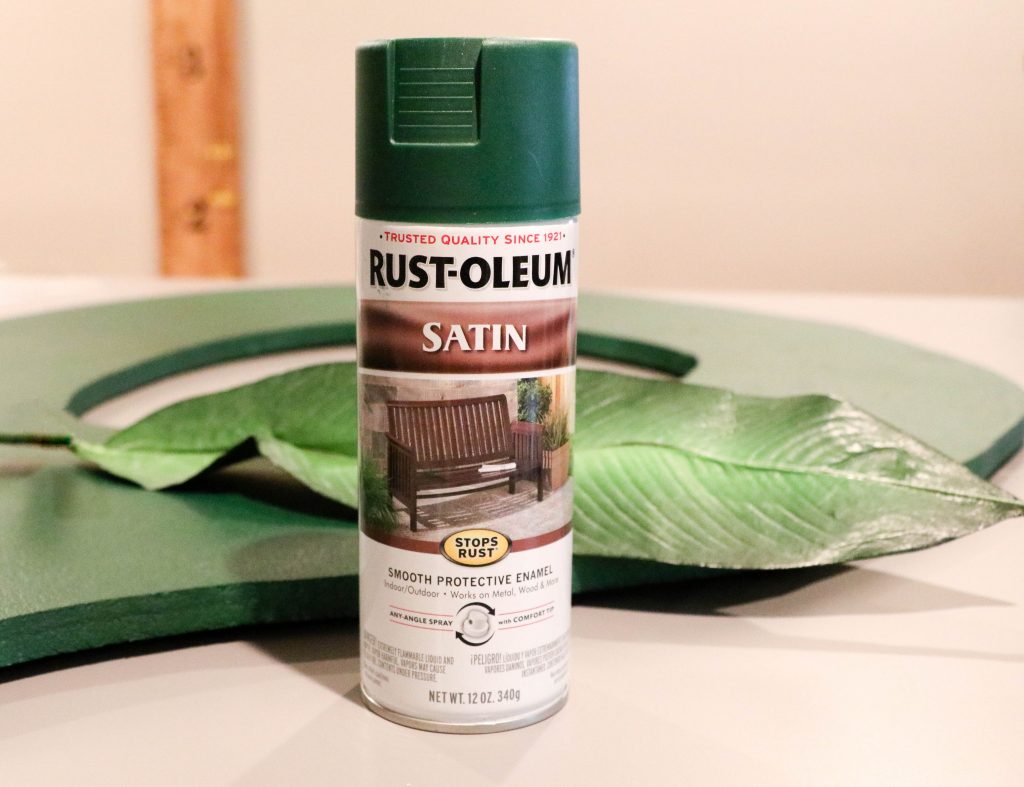
- 1-1/2″ Brass Fasteners, Dritz 2″ x 6′ Soft Waistband Elastic (Green), Rust-Oleum Satin Spray Paint (Hunter Green), Elmer’s White Glue, Loctite Super Glue: Amazon
- 3′ Cozy Flannel Fabric (Seedling Green) (Item # prd39349), 3′ Casa Collection Chiffon (Silver Lining) (Item # 15079528): Joann Fabrics
- Tropical Leaf: Michaels
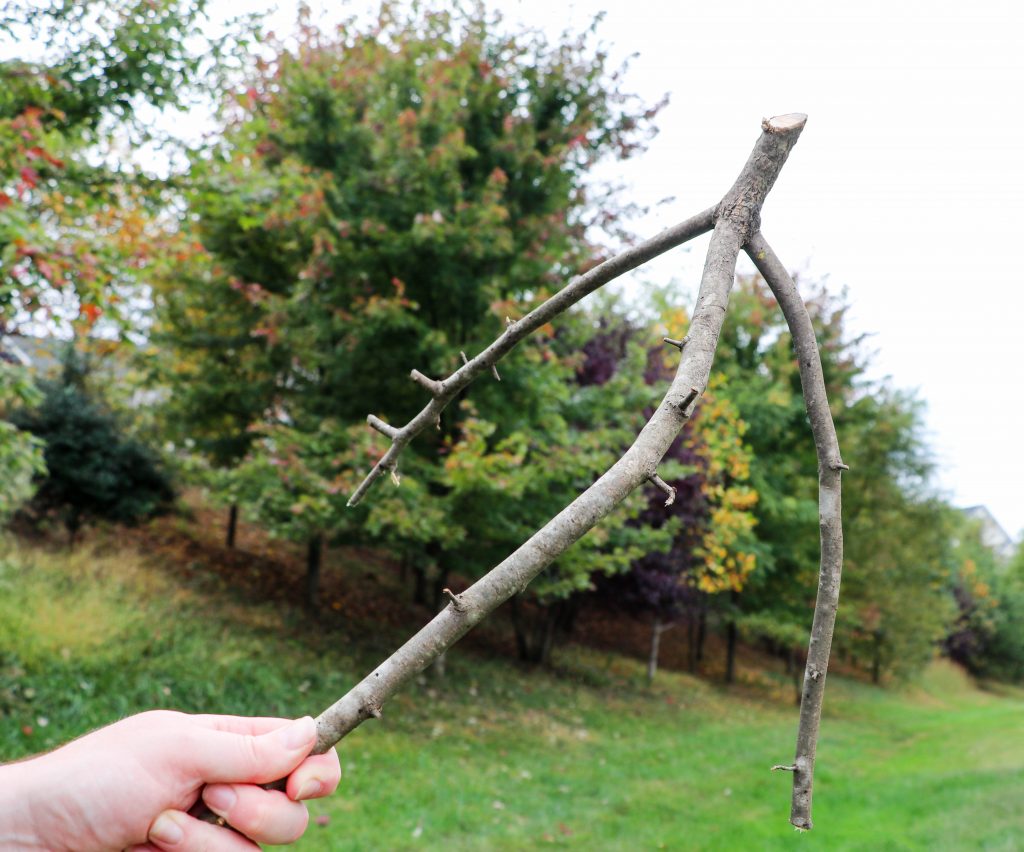
- 3/4″ Thick x 3″ Tall Greenwood Twig: Your Backyard
Tools (Hyperlinked to Amazon):
- Seamstress / Soft Tape Measure
- 12″ Straight Edge Ruler
- Tape Measure
- Black Permanent Fine-Point Marker
- Black Permanent Ultra Fine-Point Marker
- Scrolling / Orbital Combination Jigsaw
- Sawhorse x2
- Precision Knife
- Round or Needle Nose Pliers
- Foam Brush
- Bostitch Air Compressor with Corresponding Crown Stapler
- Pinking Shears
- Diagonal Pliers or Wire Cutters
- Compact Drill Driver
Measuring, Drawing & Cutting Out the Avocado Shape
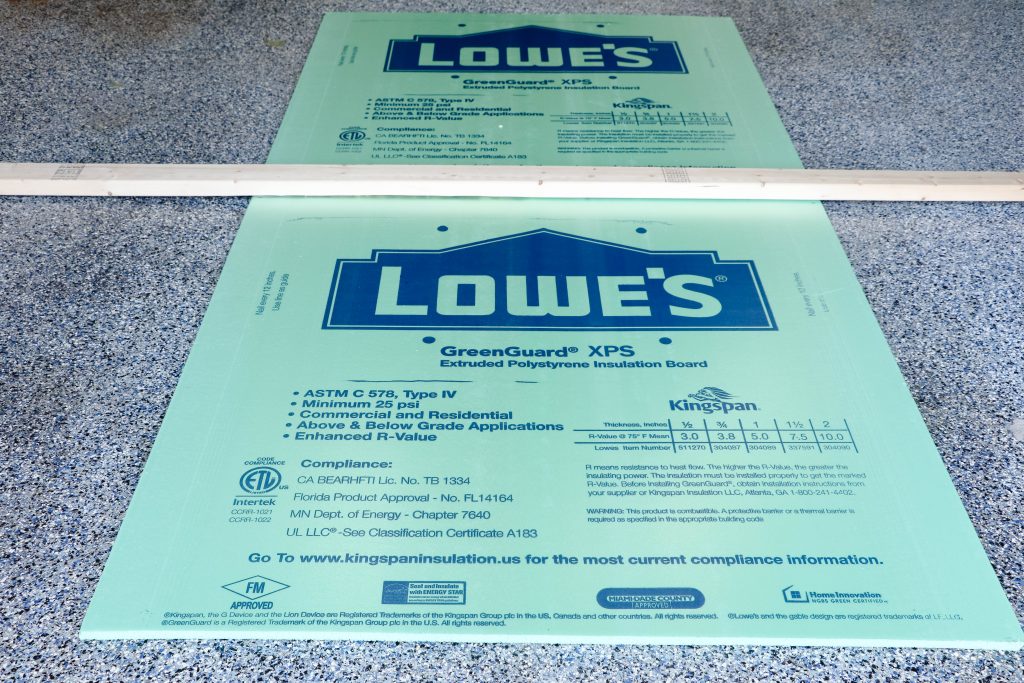
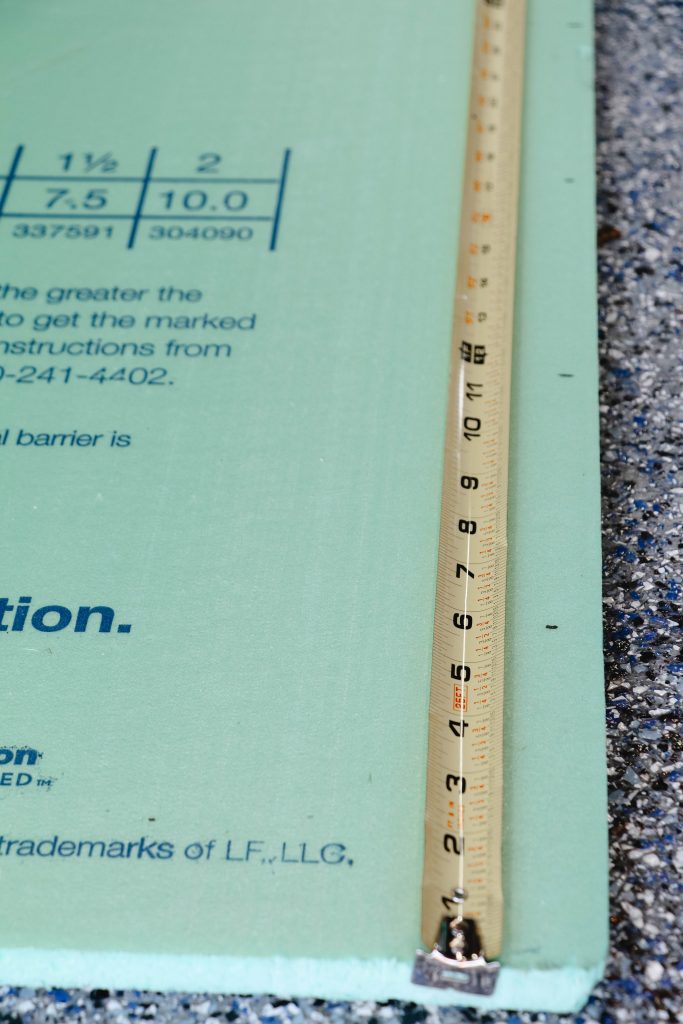
First thing we did, was take the flexible seamstress tape measure and held it vertical, floor to ceiling, a couple inches over my head and below my baby bump. This allowed my husband eyeball it to see if it looked like it would be enough clearance for the top and bottom of the avocado. The length measured at approximately 50″. Well, we were working with a near $15 8′ piece of insulation…so made the executive decision to cut the insulation exactly in half and shorten the 50″ to 48″. Since we were winging this, I was afraid we might mess something up and have to buy a whole other $15 piece of insulation to correct the problem. We could certainly lose the 2″. Tip: by-the-yard / bolt fabric tends to come in a width of 48″, which meant our 3′ (one yard) of fabric would work within our adjusted design.
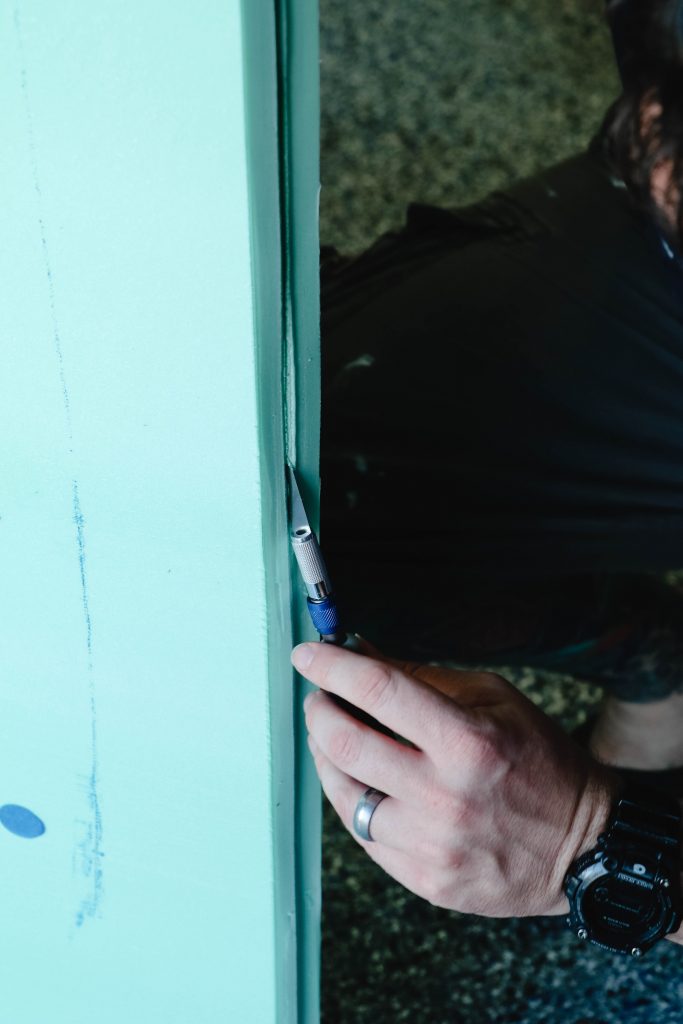
We used a spare (and checked for straightness) 2’x4′ board to score a line across the insulation with our precision knife. Once through several passes, we were able to bend the board in half and do one final cut to split the two pieces in half.
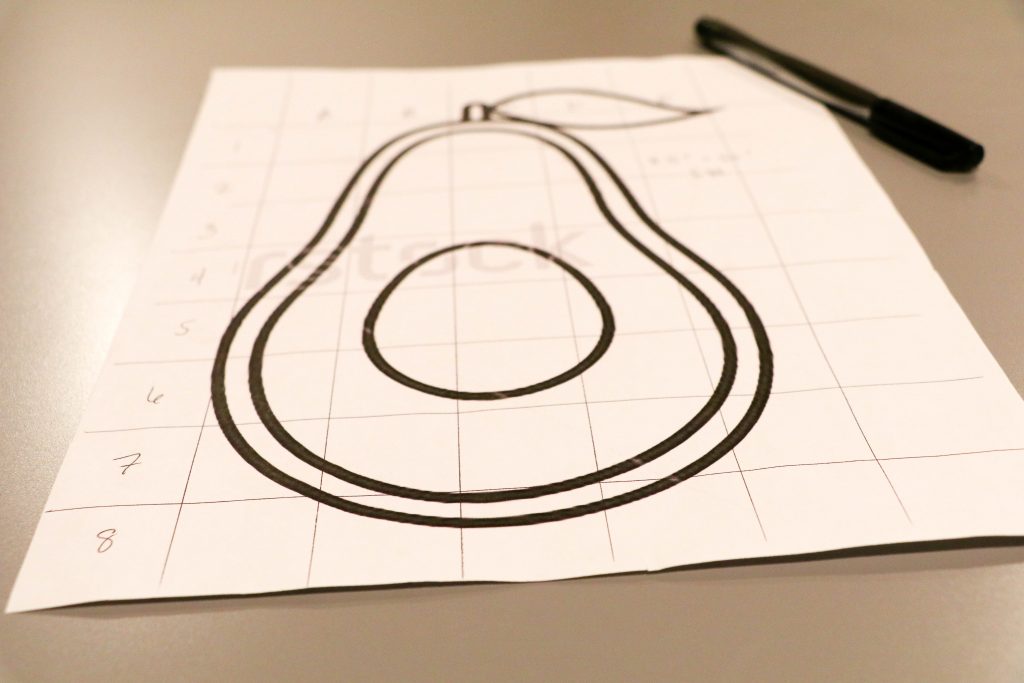
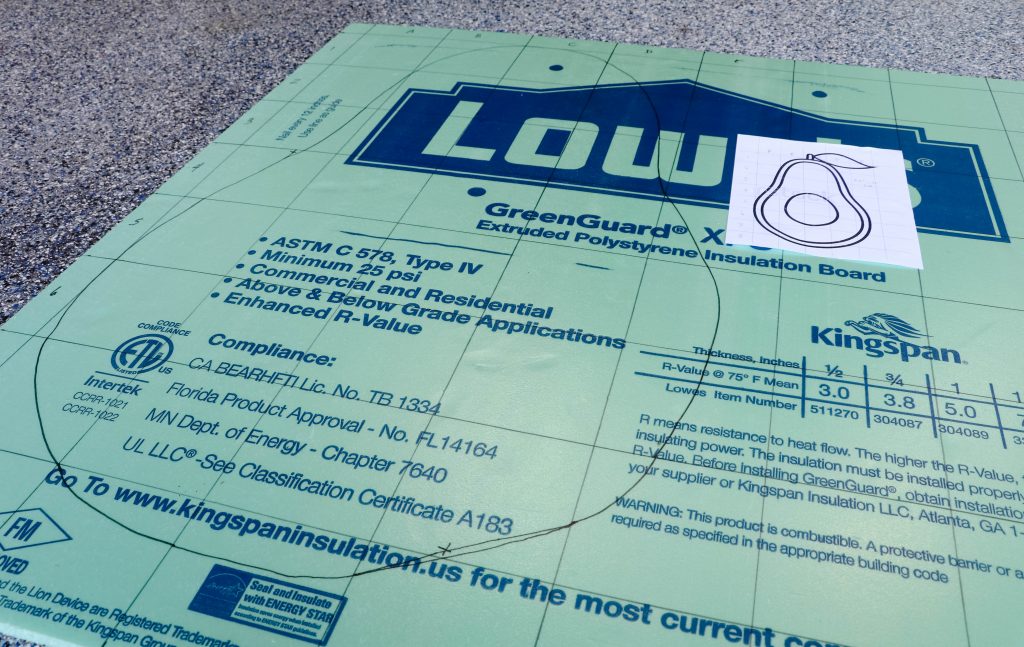
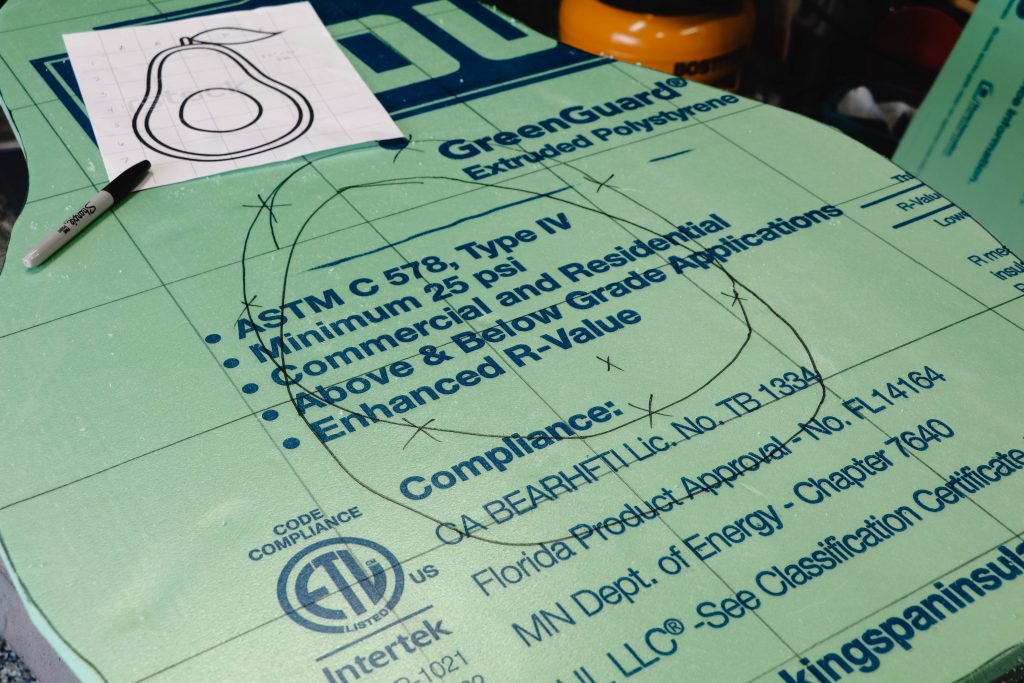
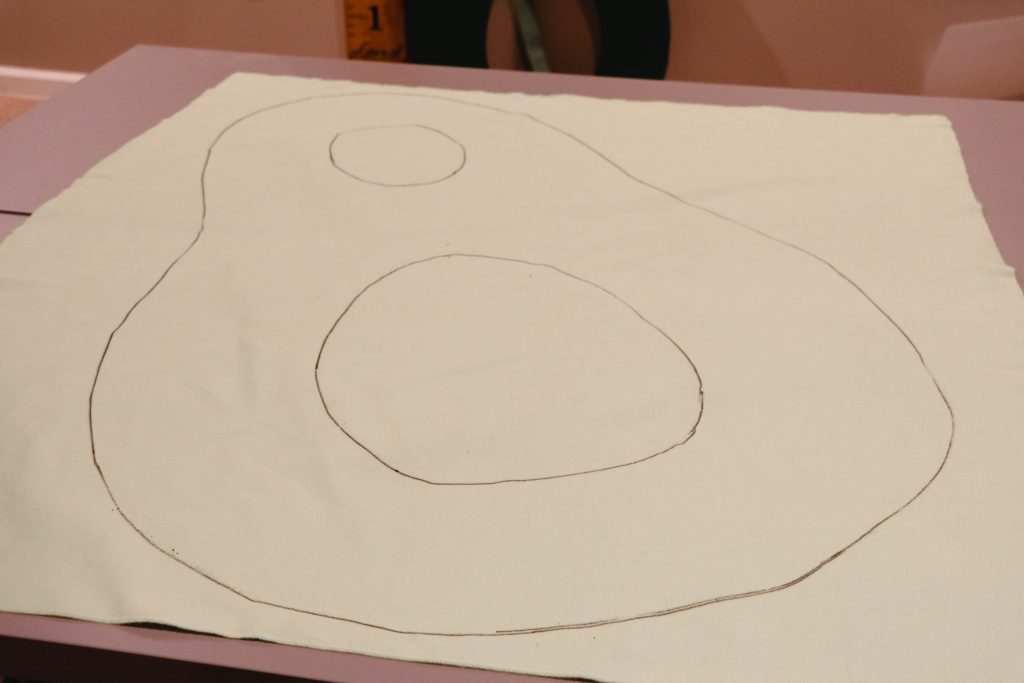
I then searched Google Images for “avocado line drawing,” and went with the most simple option that returned in the top of the results. I printed the avocado out as large as possible on 8.5″x11″ paper.
Next, I decided against freehand drawing the avocado…just knew it wouldn’t come out right. So, I put into practice something I had learned years ago in art class (thank you mom and dad for paying for those classes for me)! Using a straight-edge ruler, I drew out a grid with 1″ squares on the linear avocado print out. (Better yet, if you have a way to project this onto a wall, you could draw the shape without having to do the grid part). I then did the math to figure out what 1″ of my drawing would convert to on my original measurement of 50″ tall. The avocado on printed paper took up approximately 8.5 squares. 50″ ÷ 8.5 = 5.88″. But, as I mentioned earlier, we trimmed 2″ off, so we really only had 48″ to work with and on the fly drew our grid lines on the insulation at 5.75″ (made it easier to keep track of anyway), on the side with the logo’ed print.
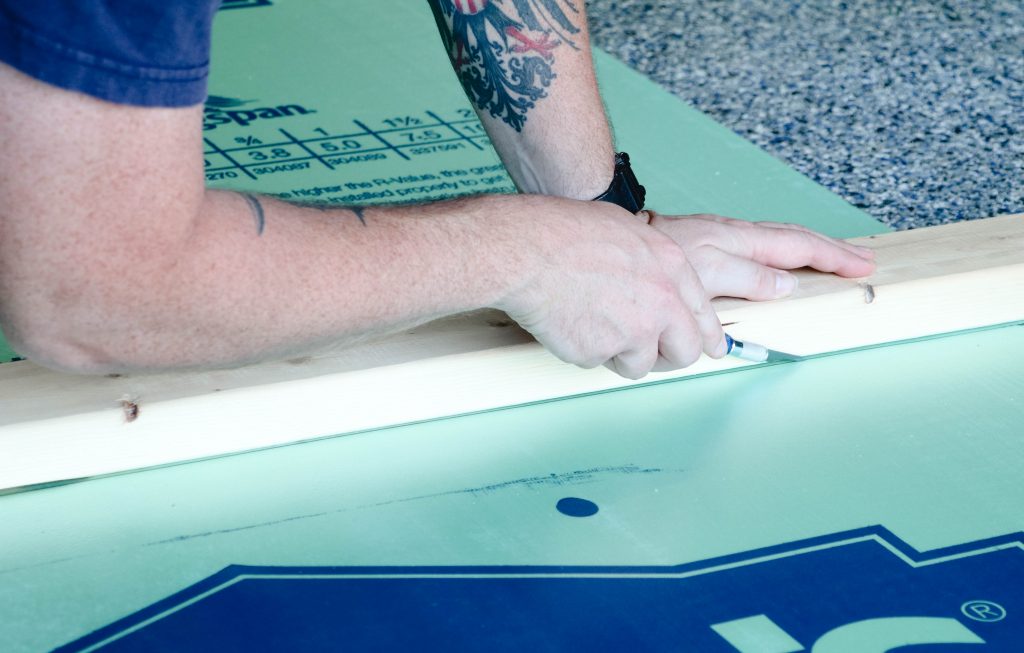
Making marks on all four sides of the board at 5.75″ apart, we used the 2’x4′ from earlier to draw lines across the insulation to connect the marks. Once the grid lines matched on paper and insulation, we numbered the rows and lettered the columns, to keep track. I then focused on one square at a time to draw out the shape of the avocado.

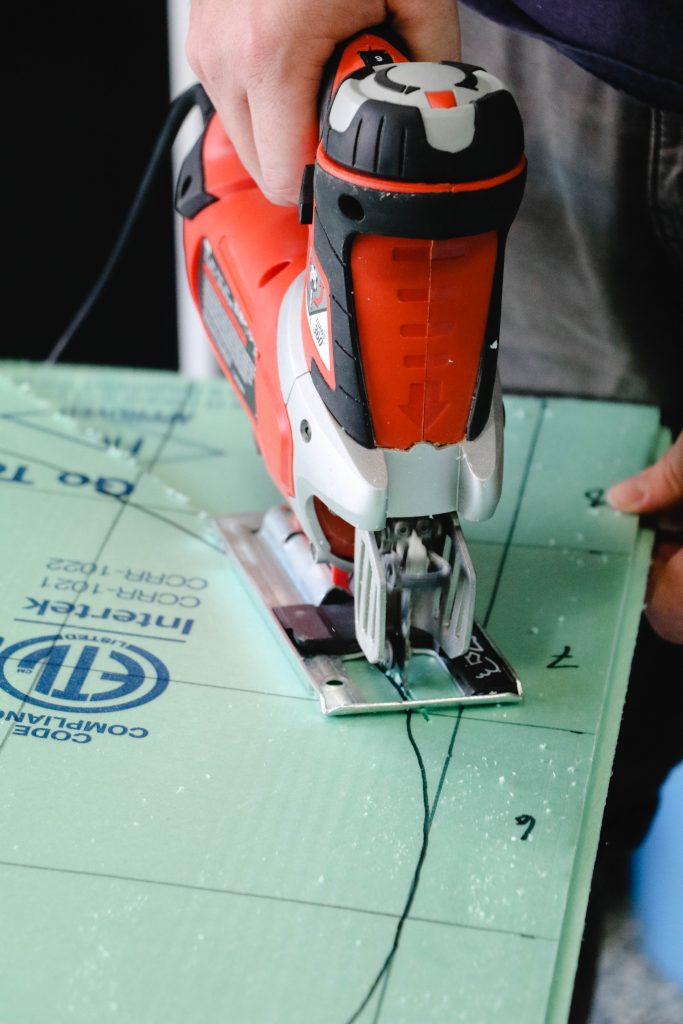
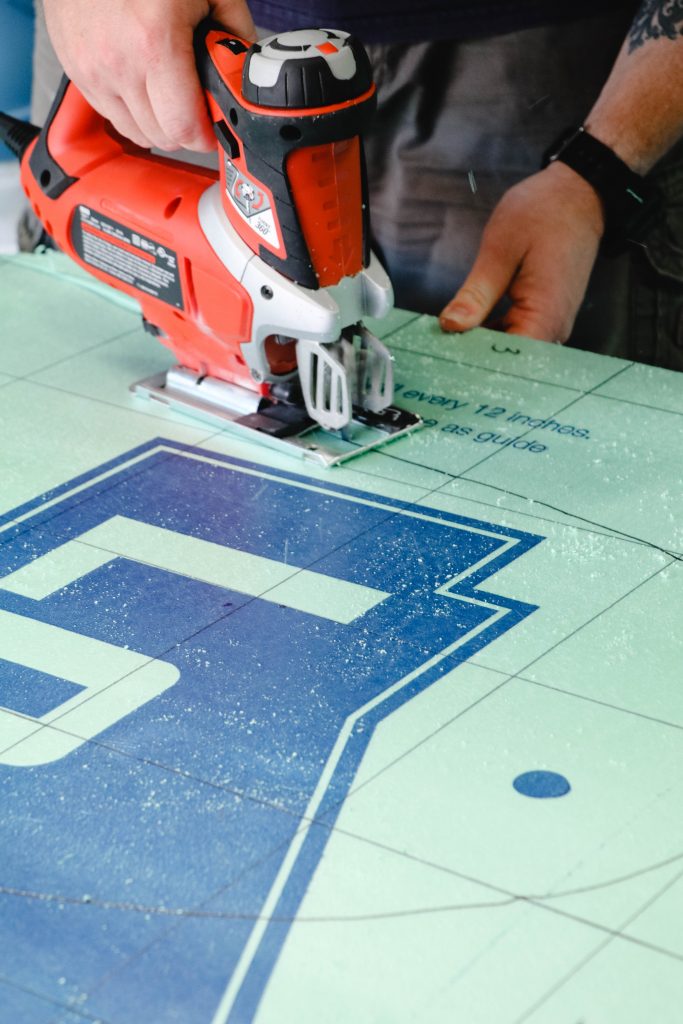
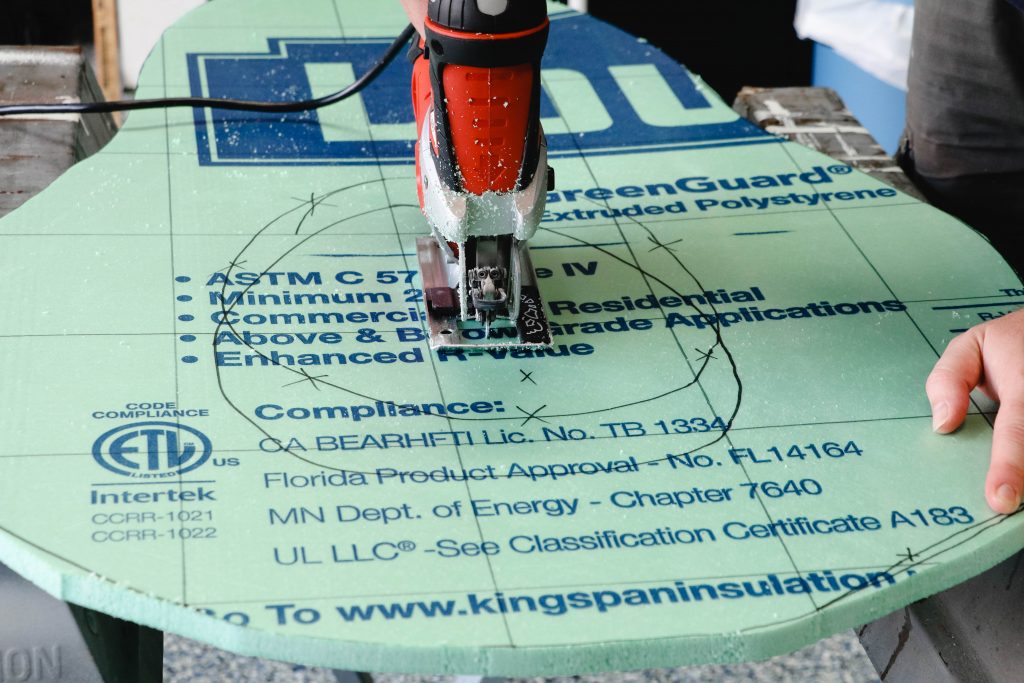
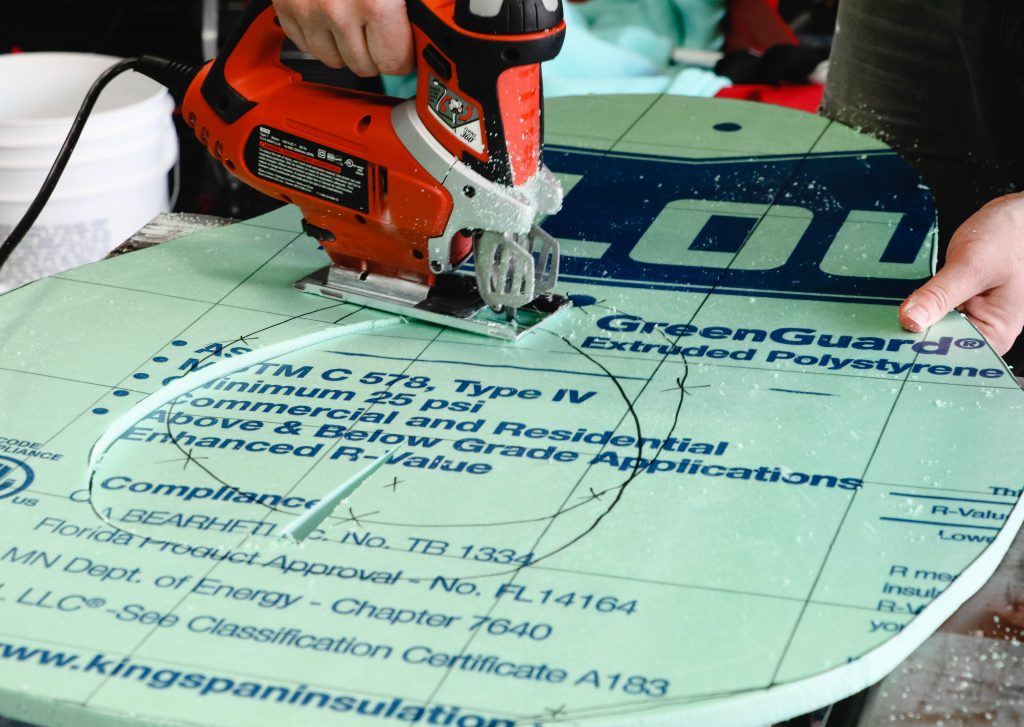
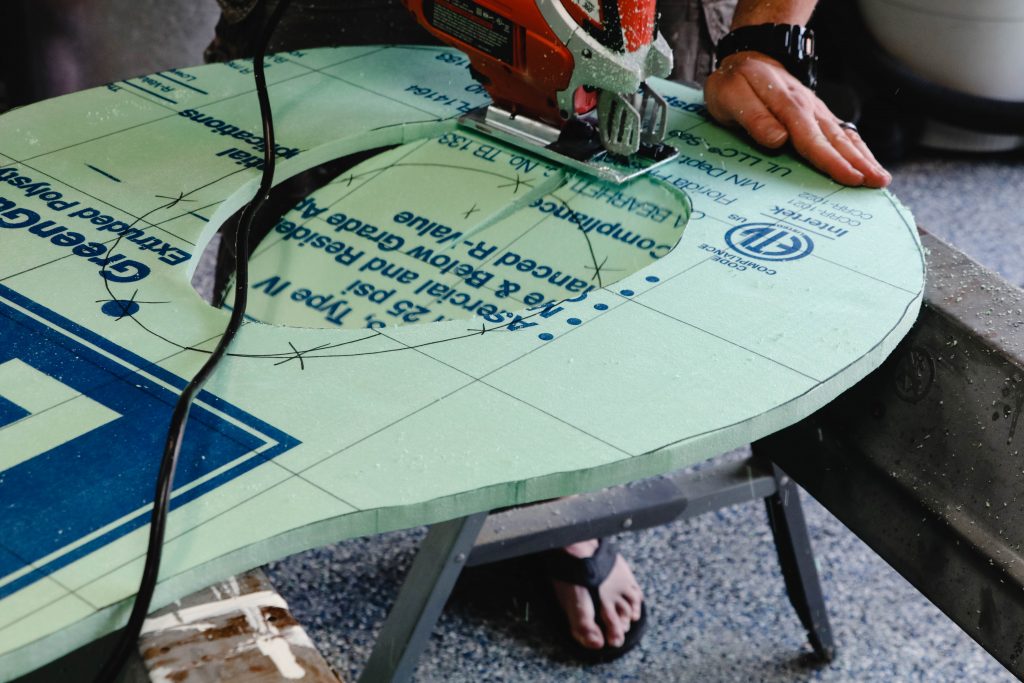
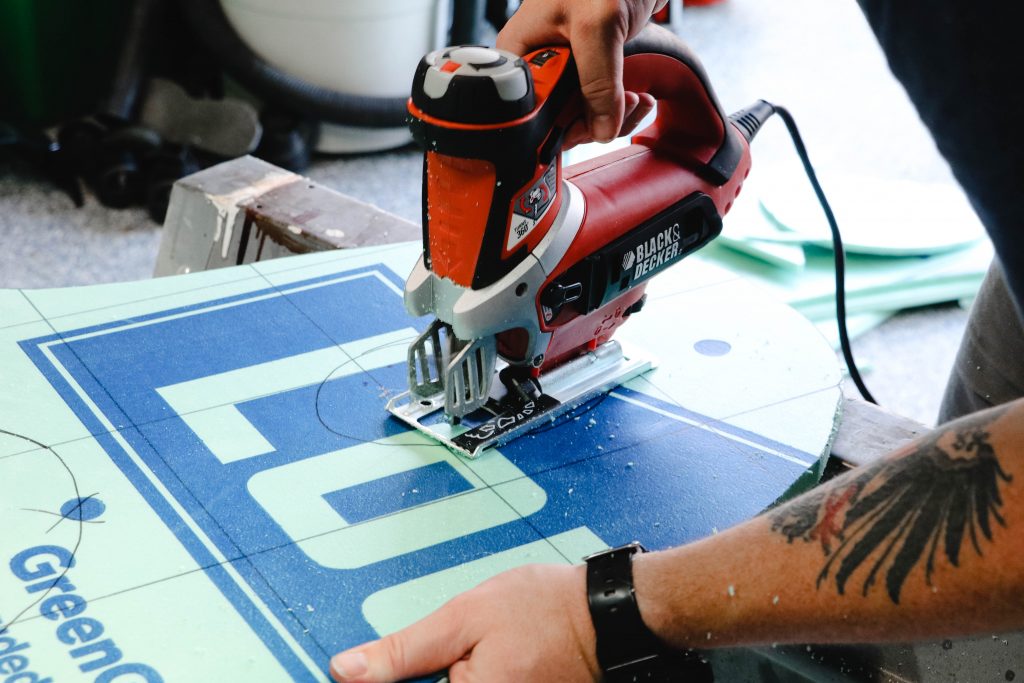
As a final step here, we used the scrolling / orbital combination jigsaw to cut out the avocado, propped up on a pair of sawhorses, making sure to rotate it so we wouldn’t come near the sawhorses with the jigsaw as we made progress.
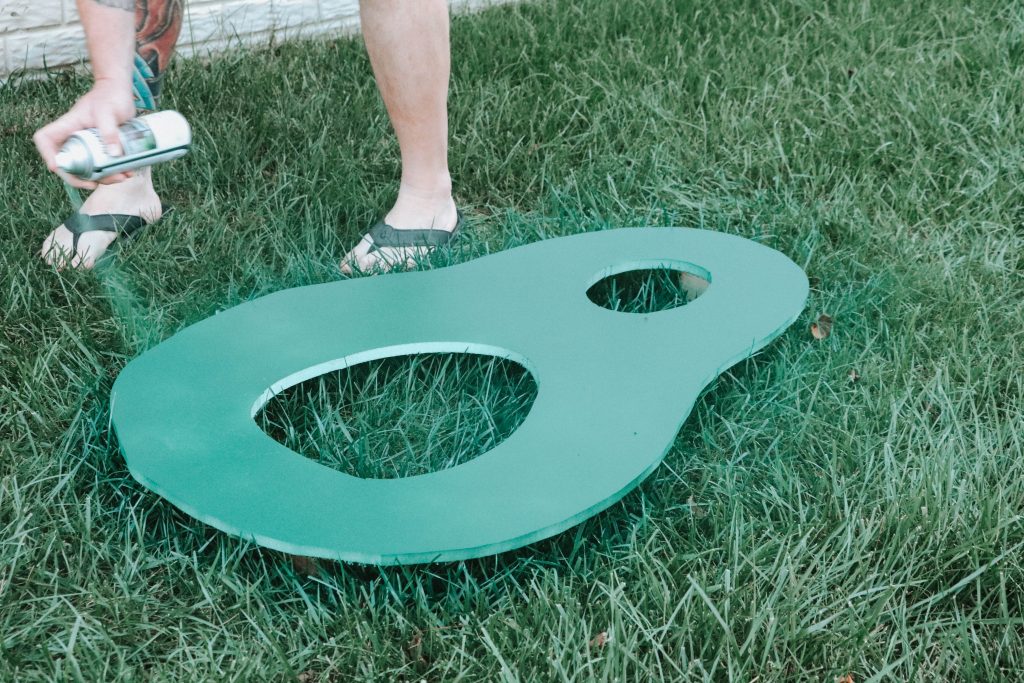
Painting the Avocado
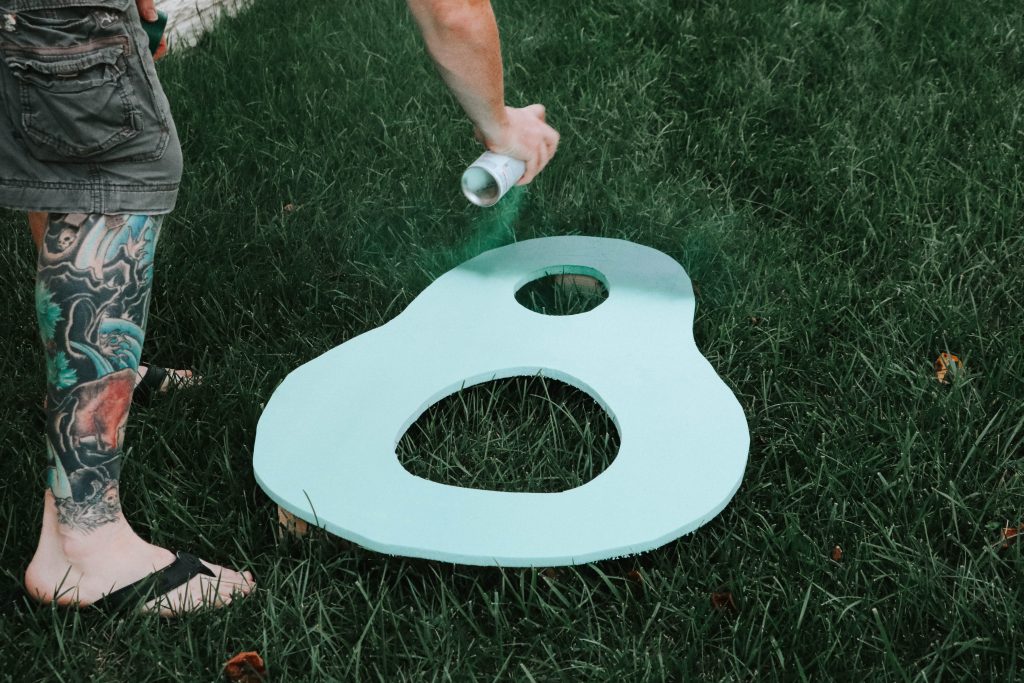
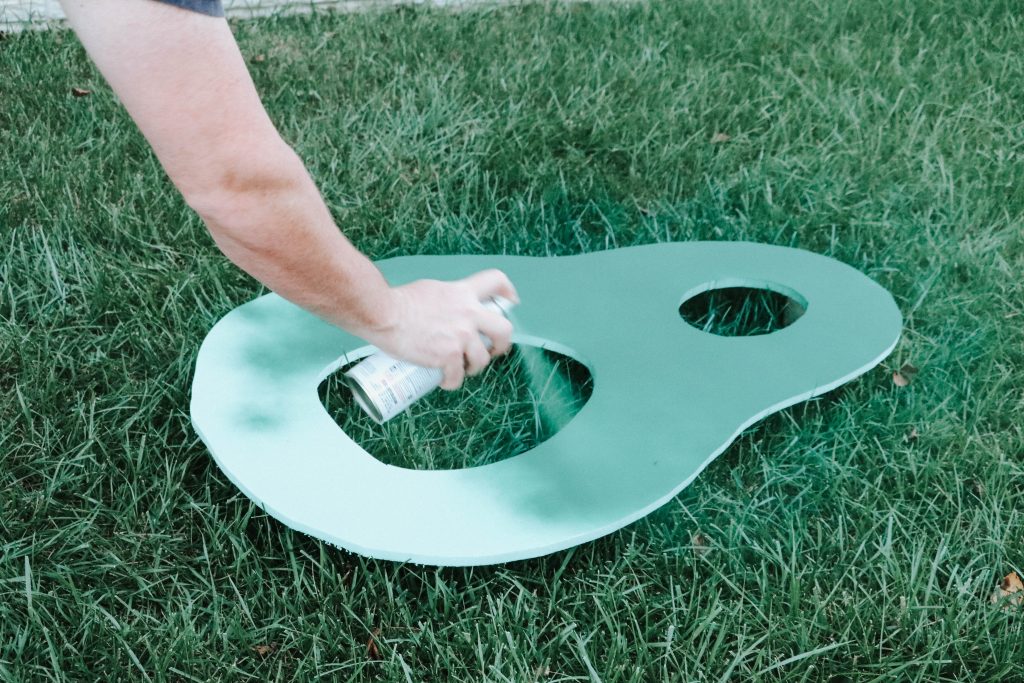
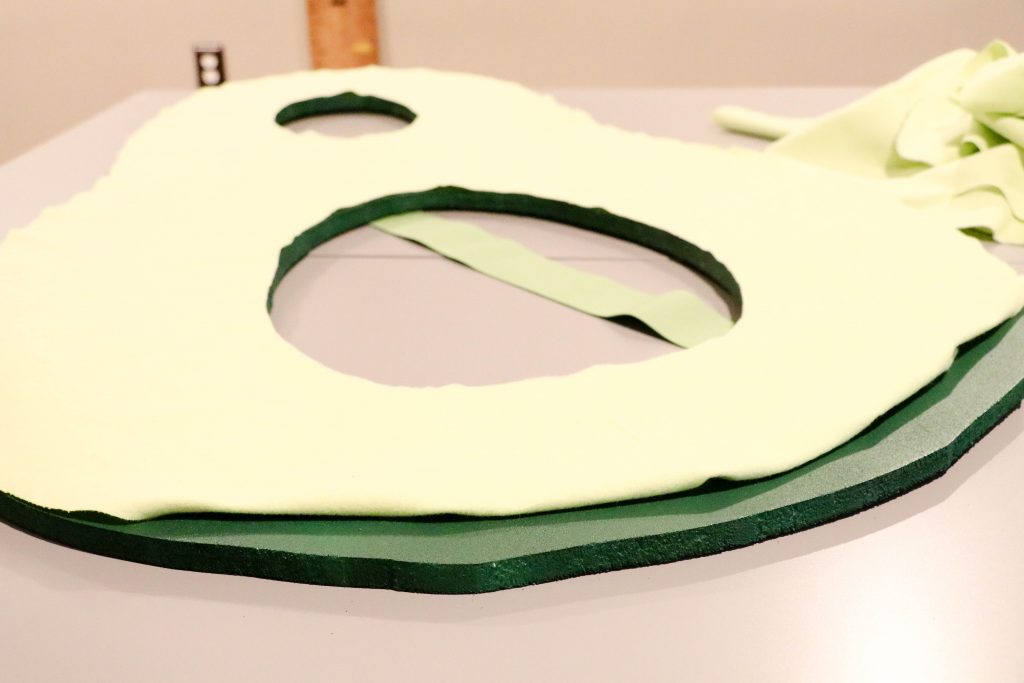
Once we had our avocado base shape, it was time to paint it. We used a can of hunter green satin spray paint and painted it in the grass, since they were nearly the same color. We applied two coats to each side, allowing for ample time to dry in between. Also made sure to get the outside and inside edges while spraying, as well.
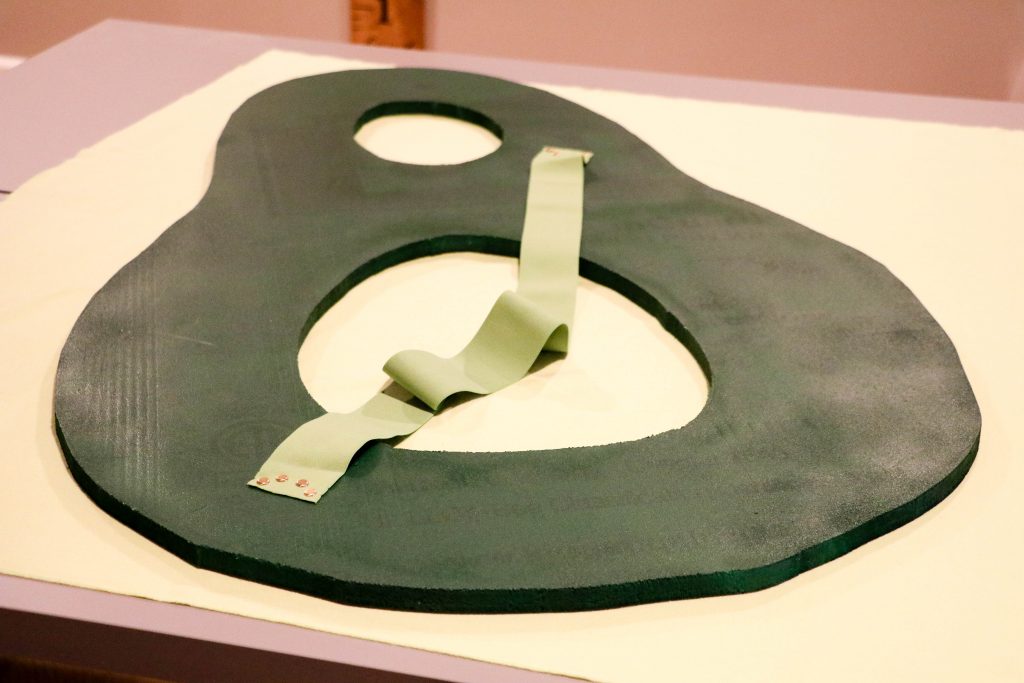
Attaching the Shoulder Strap
Note: for the next few steps, you’ll notice that we’re working on a surface in our home office area, our makeshift “conference table.” You can learn more about how we completed an IKEA Hack in the past year to build these. Additionally, you may spot our family growth chart on the background wall. To learn more about the DIY growth chart, visit the “making of” blog post.
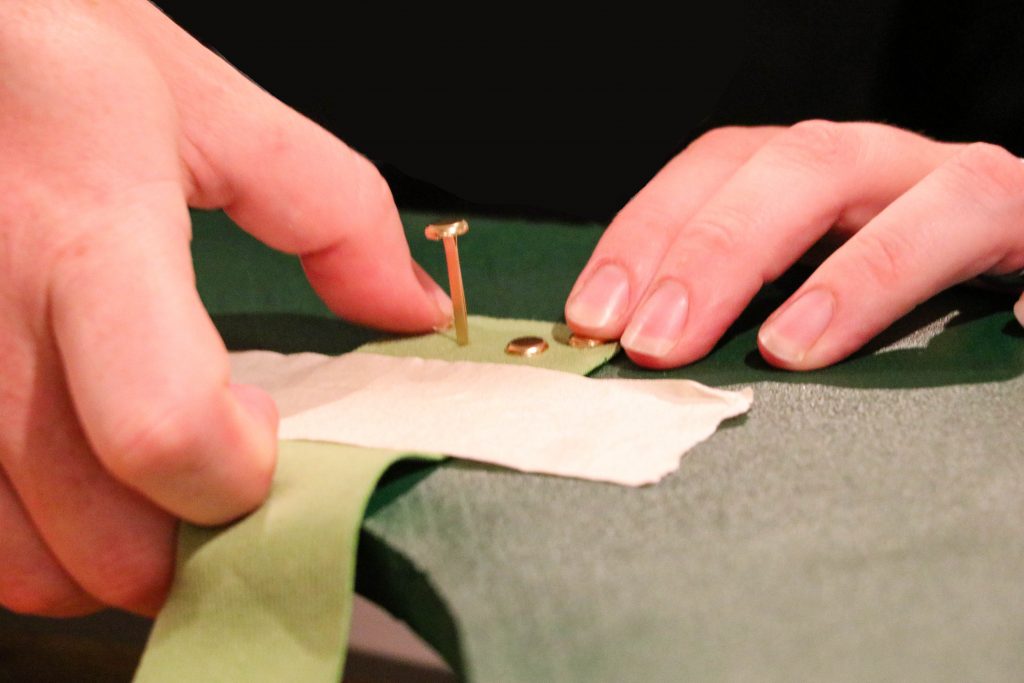
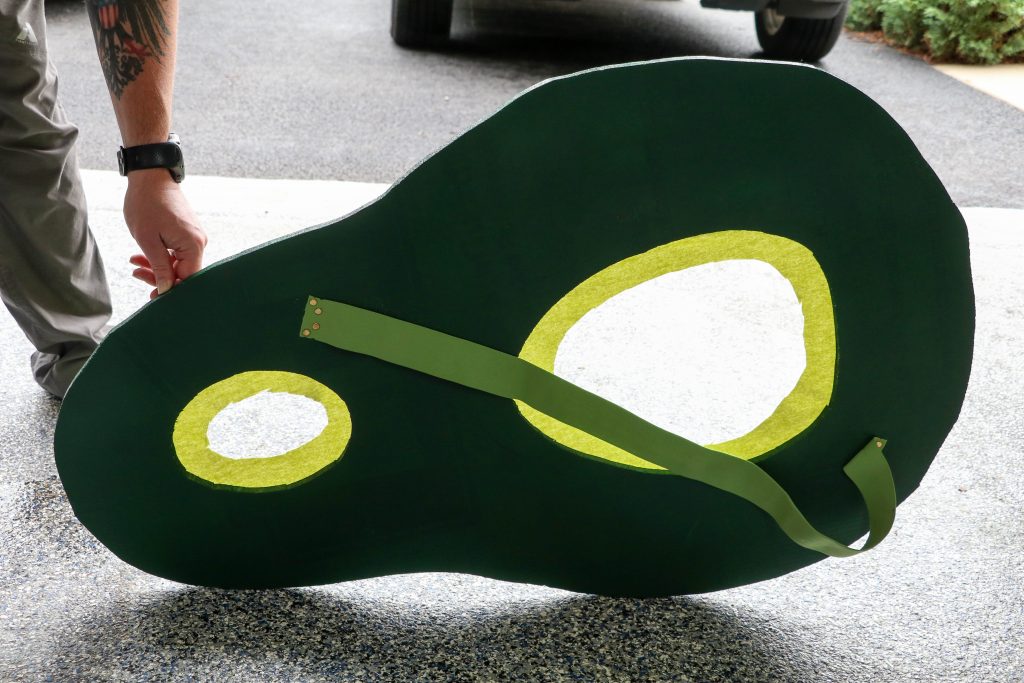
Picking back up a few days later allowed for errands to be run in between. During those errands, I consulted with a store associate at my local Joann Fabrics store, and described that I needed some sort of “strap” to be able to attach this to me hands free. She immediately suggested the “elastic” section in the store and pointed me on my way. Low and behold, they had exactly what I was envisioning and it was in green too! She also suggested attaching the strap with a staple gun and I didn’t think that was the best idea to hold it in place. Somehow I thought of those brass fasteners we used to use years ago to hold 3-hole punched papers together. So, I had picked up a set of heavy duty ones at Walmart nearby. I thought they might hold the strap in place and fold completely flat on the front side of the costume, so not really noticeable at all.
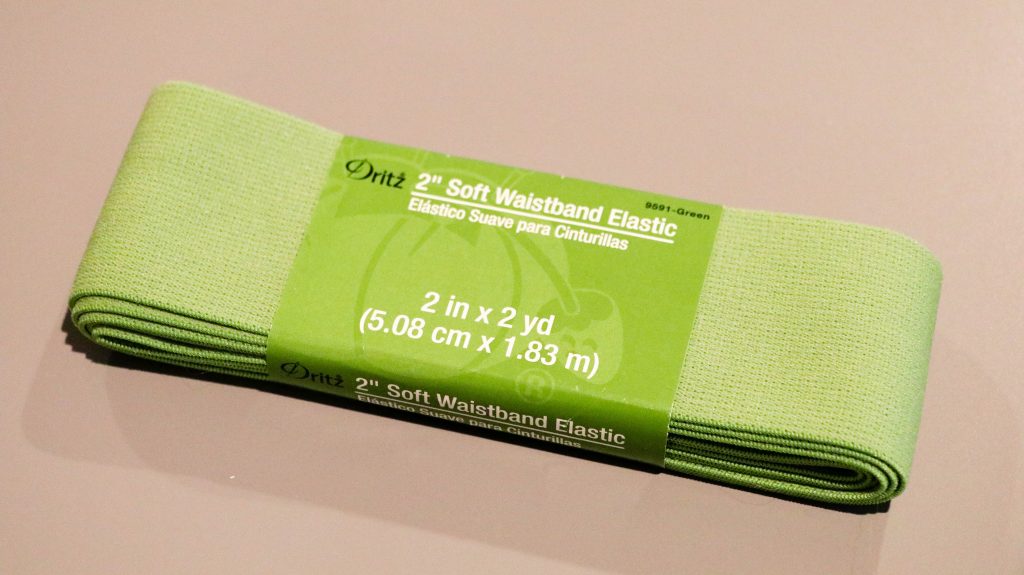

The elastic band was 6′ long and initially we thought I would want to wear this like a reverse backpack, to get in and out of it easily on my own. We cut the elastic band exactly in half.
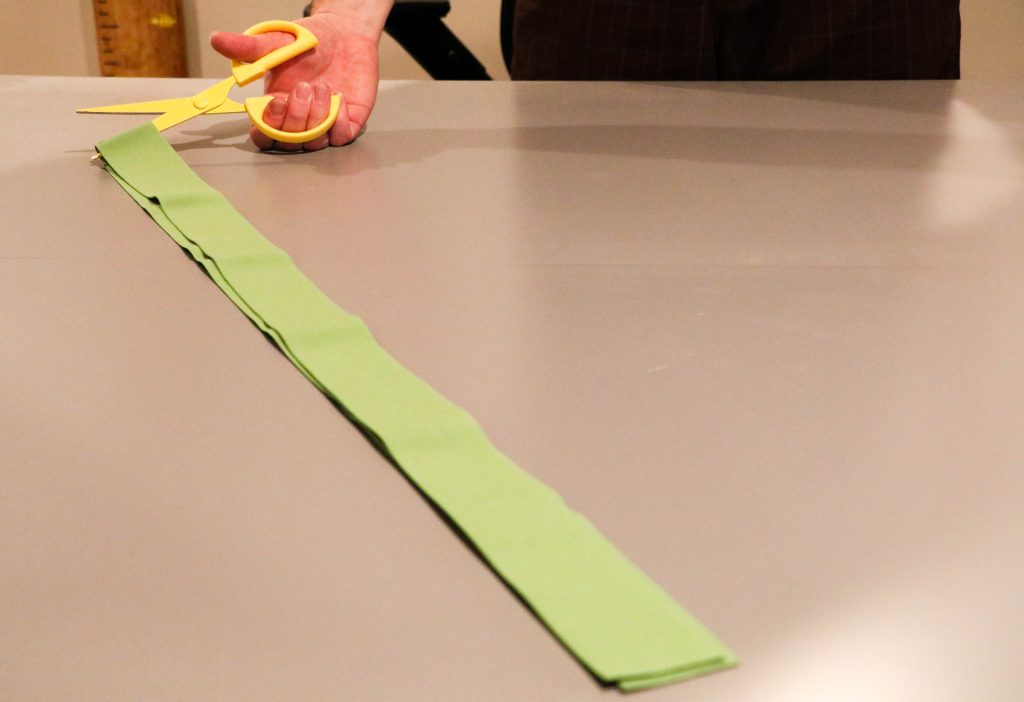
Next, using thick masking tape, we did a trial run on the reverse backpack idea. It was a no-go. It just wouldn’t stay on my shoulders very easily.
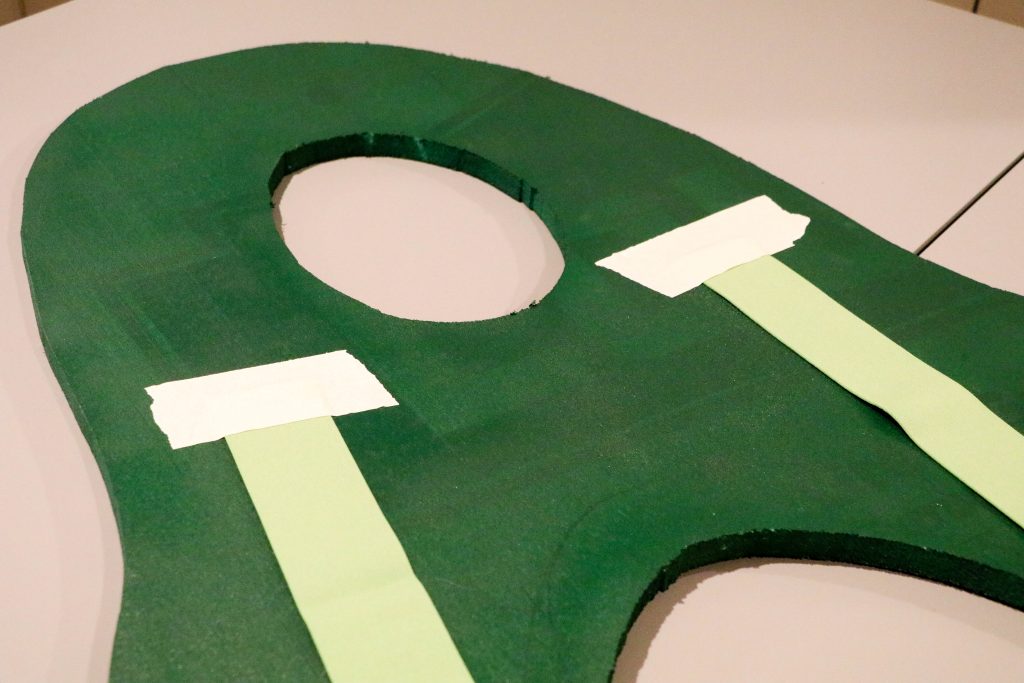
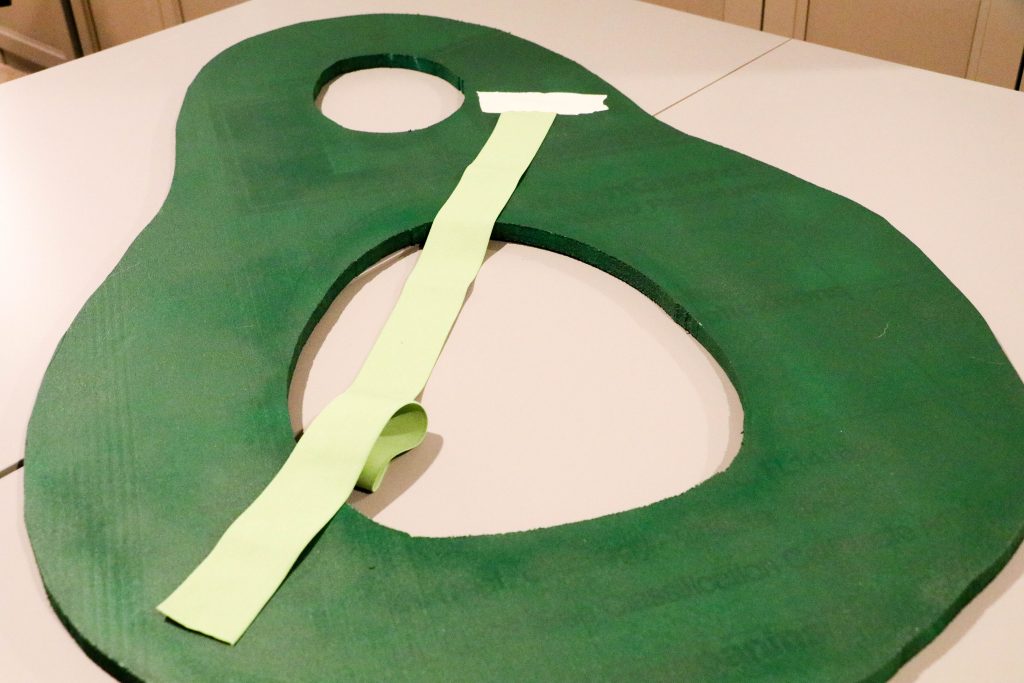
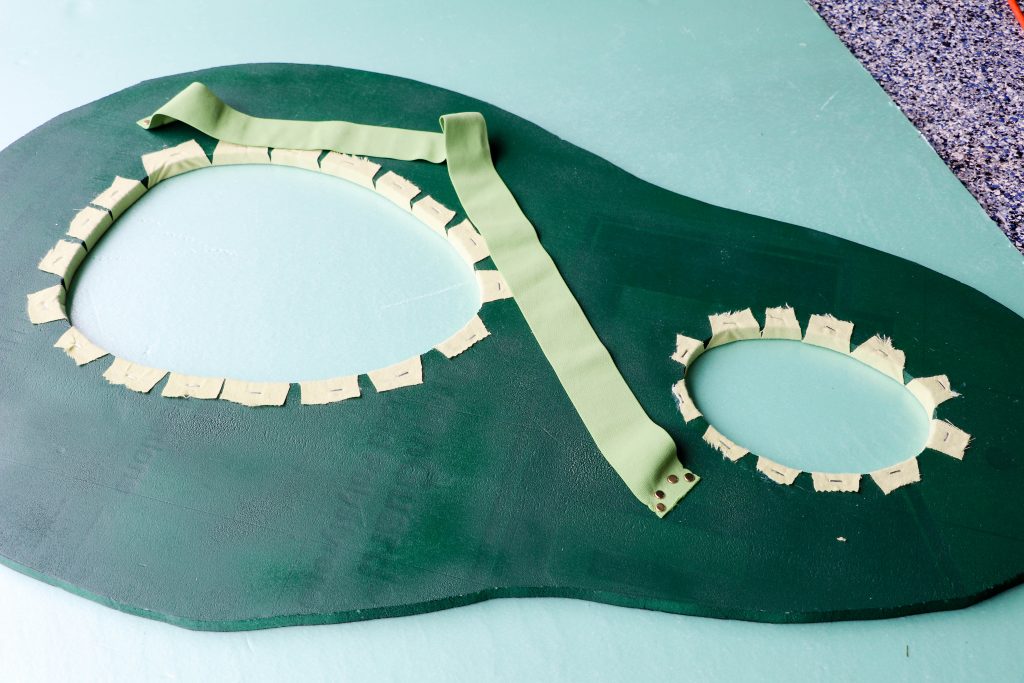
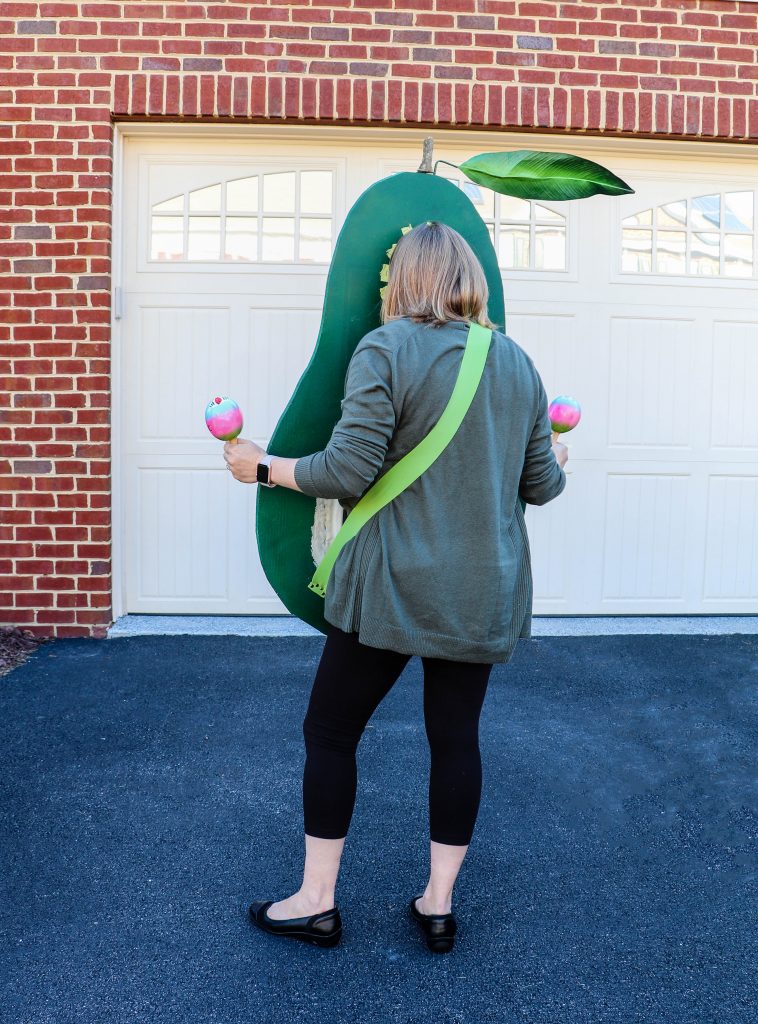
So, we took a gamble and went with a single-strap diagonal approach. We attached the top piece in an area we knew would be covered by the light green flannel fabric and then once that was secured, we trial-ran the bottom piece to see if we needed to shorten it. Didn’t think we did. So, we attached that in the opposite corner, knowing we could always shorten the strap after the fact and use the same holes put through the insulation on the first pass.
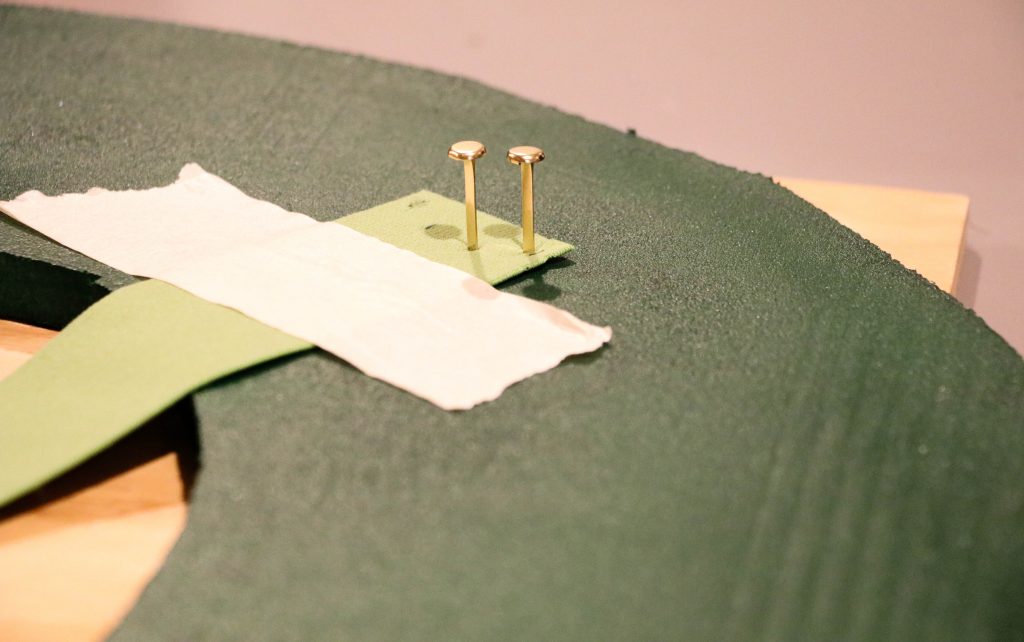
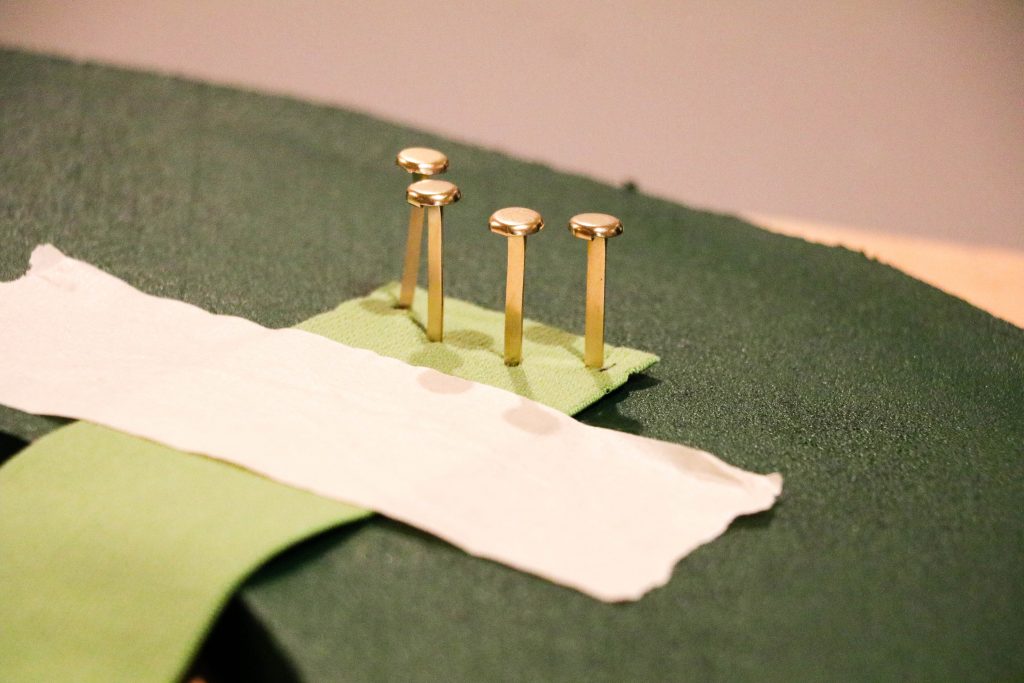
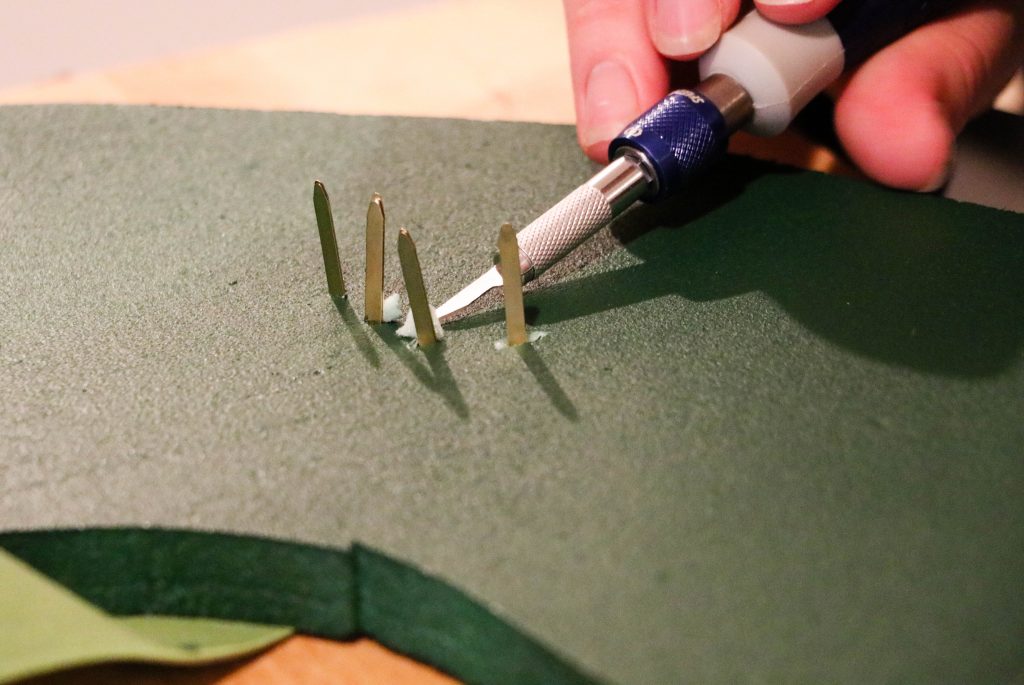
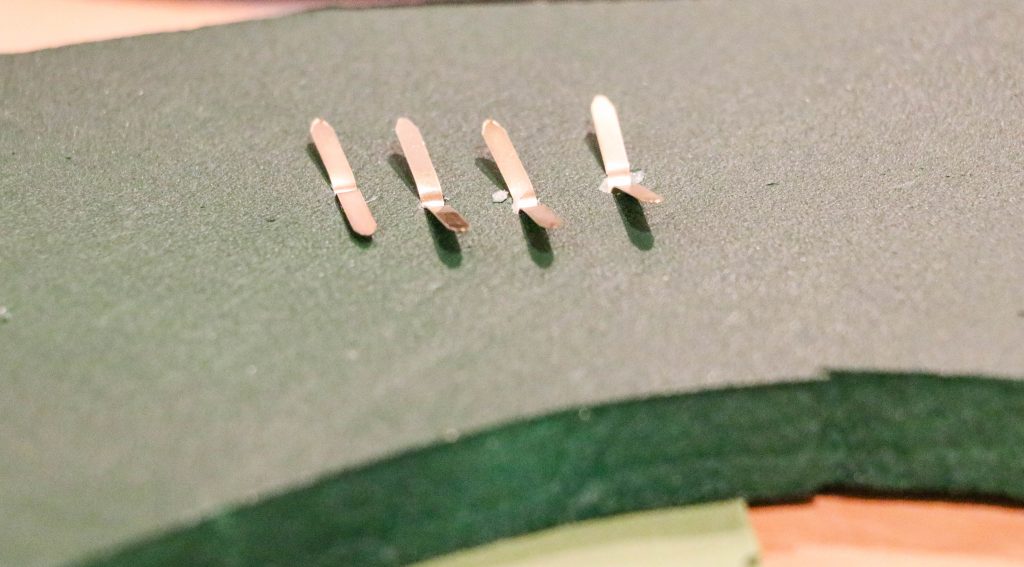
To attach the strap, we decided on four fasteners on each end. We drew small lines with the ultra fine tip permanent marker for where to make pilot “slices” with our precision knife. We staggered the holes and fasteners to not jeopardize the integrity of the elastic band. Once the holes were in place, we carefully pushed the fasteners through the board, in all the exact same direction, so none of the “wings” would overlap each other and they would lay relatively flat on the front side of the costume. After each was pushed through the insulation, we used the precision knife to clear away any remnants that were pushed out the other side. And, used needle nose pliers to turn the tips of the “wings” back into the board again. This kept them lying very flat.
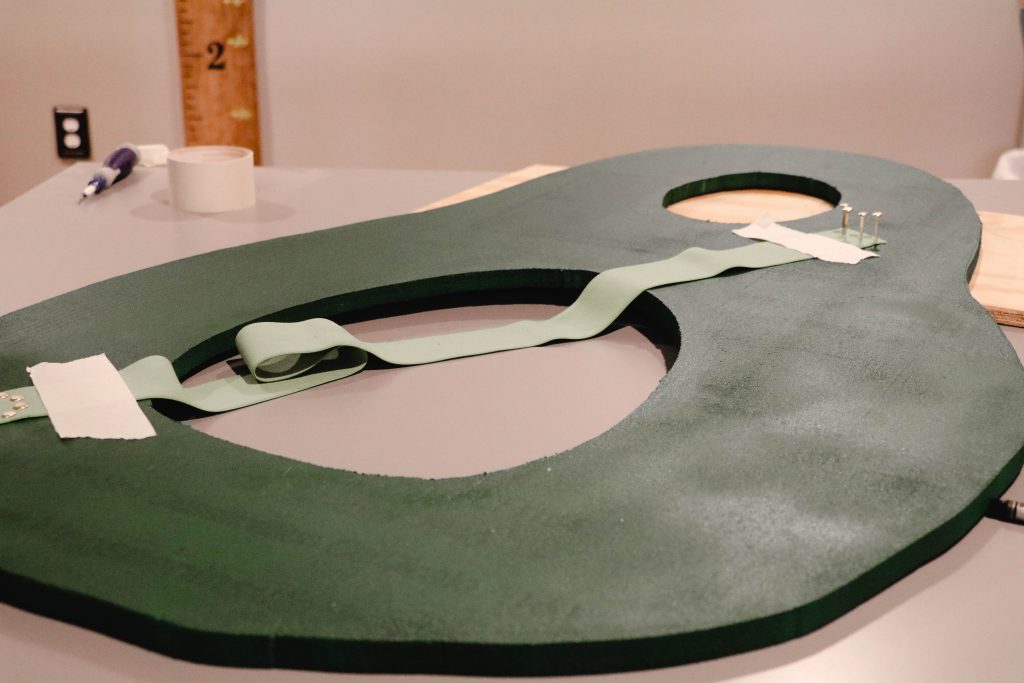

Turns out, a trial run wearing the avocado confirmed we only needed one diagonal strap.
Attaching the Fabric
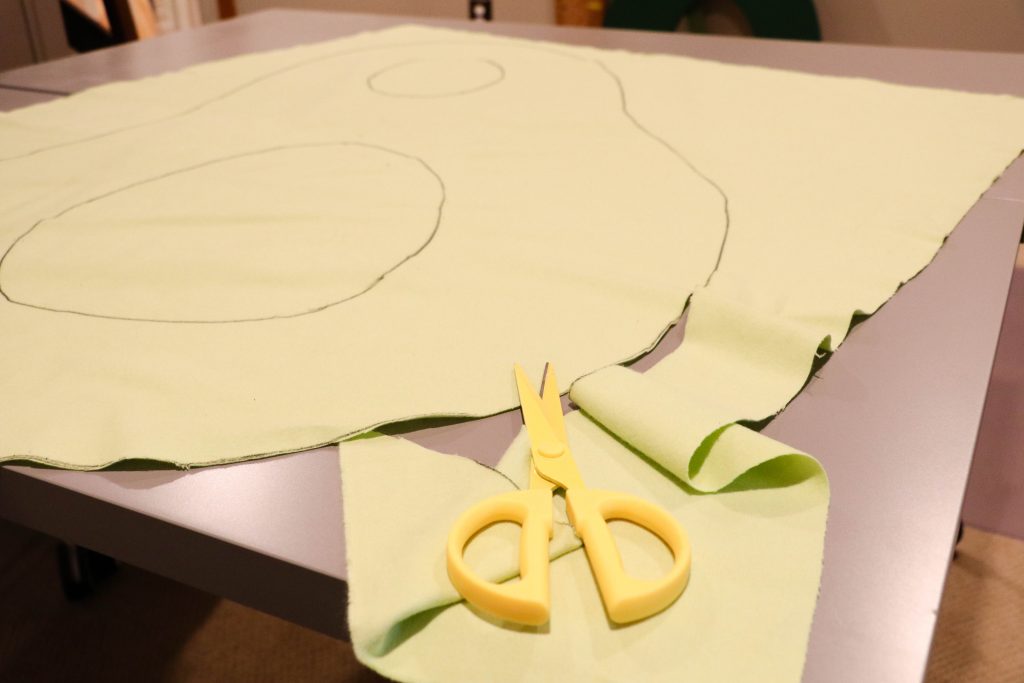
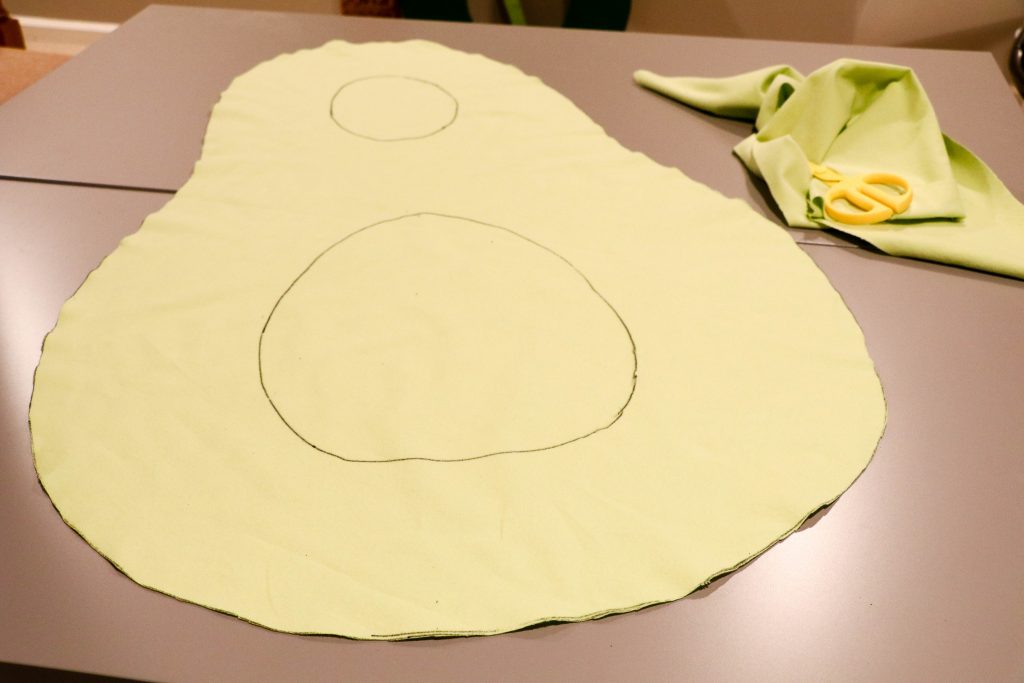
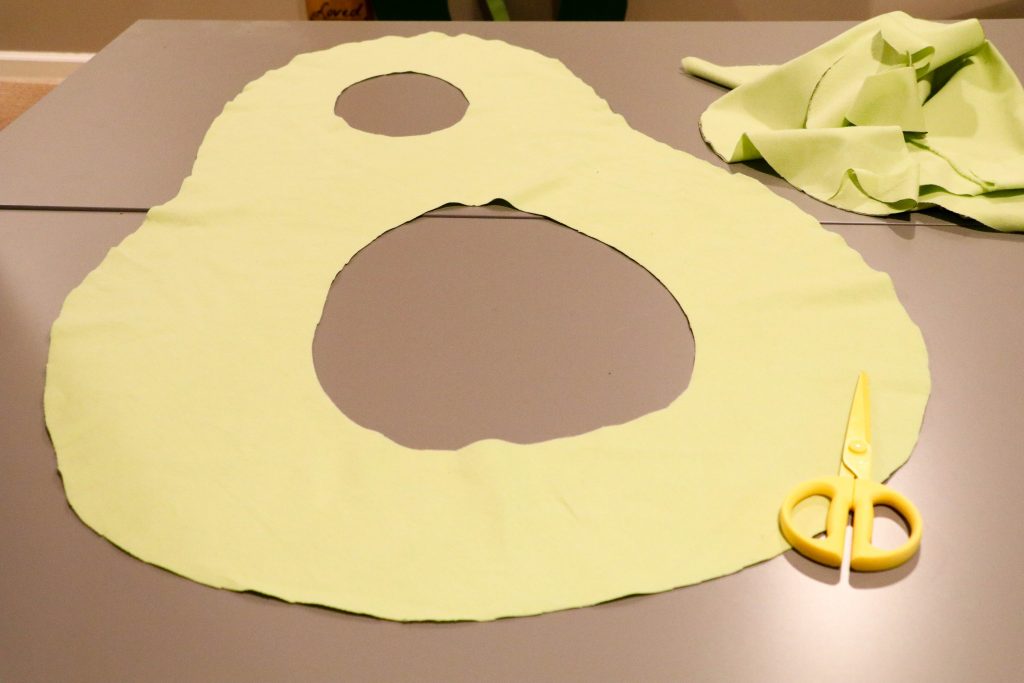
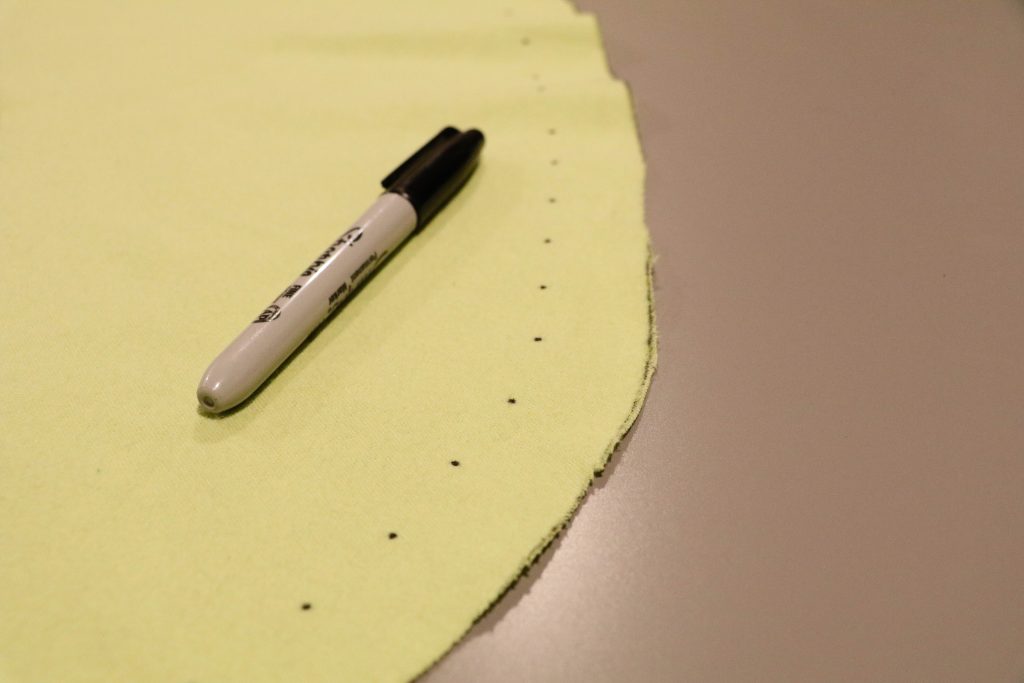
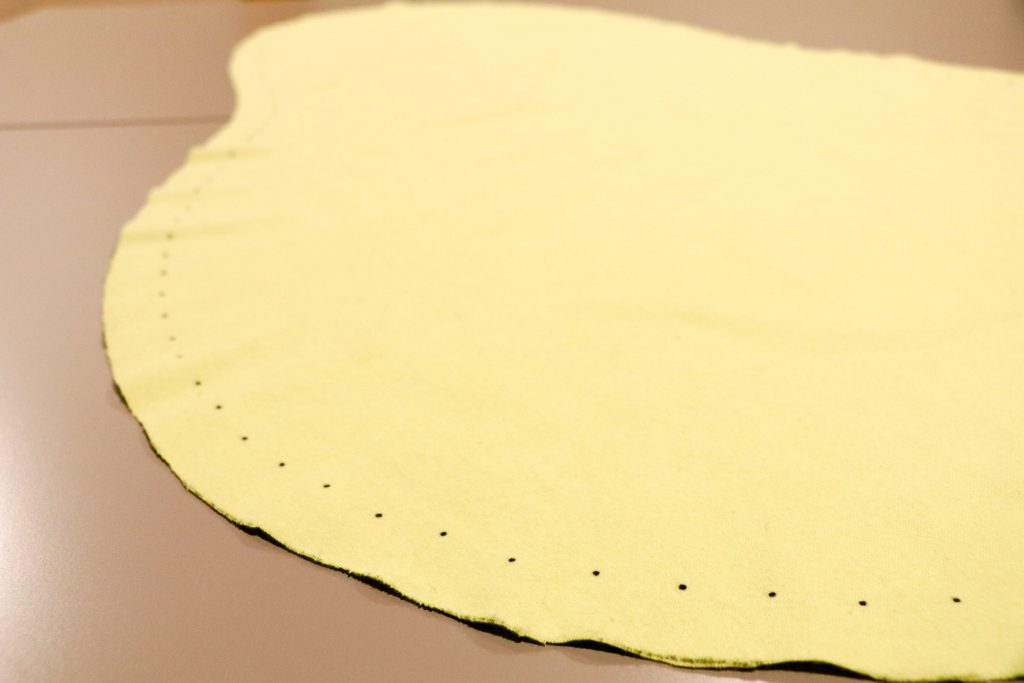
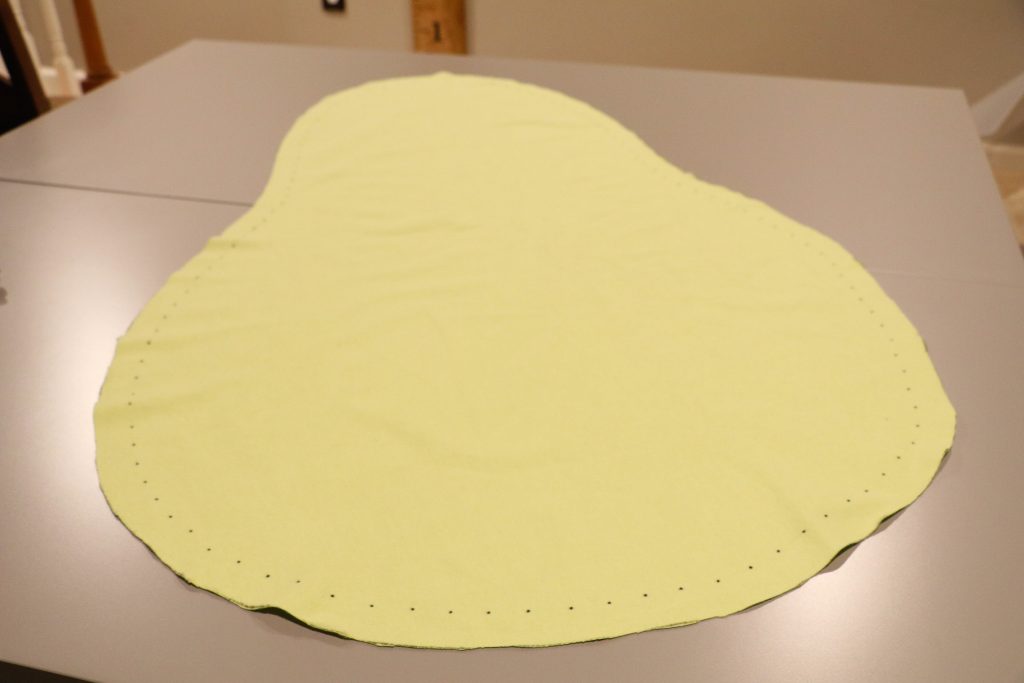
After ironing the fabric pieces purchased earlier at Joann Fabrics, we laid the light green flannel piece out on our makeshift home office “conference table,” and set the front side of the avocado face-down on top of the fabric. I used a fine tip permanent marker (with cardboard underneath the fabric to keep the marker off the table surface) to trace out the entire shape onto the fabric, and then followed that up by cutting it out. Once cut out, I laid the fabric on top of the avocado and then folded back the material in a couple of test places to determine how much of the dark green avocado “skin” I wanted to show around the edges. I ended up deciding on an inch.
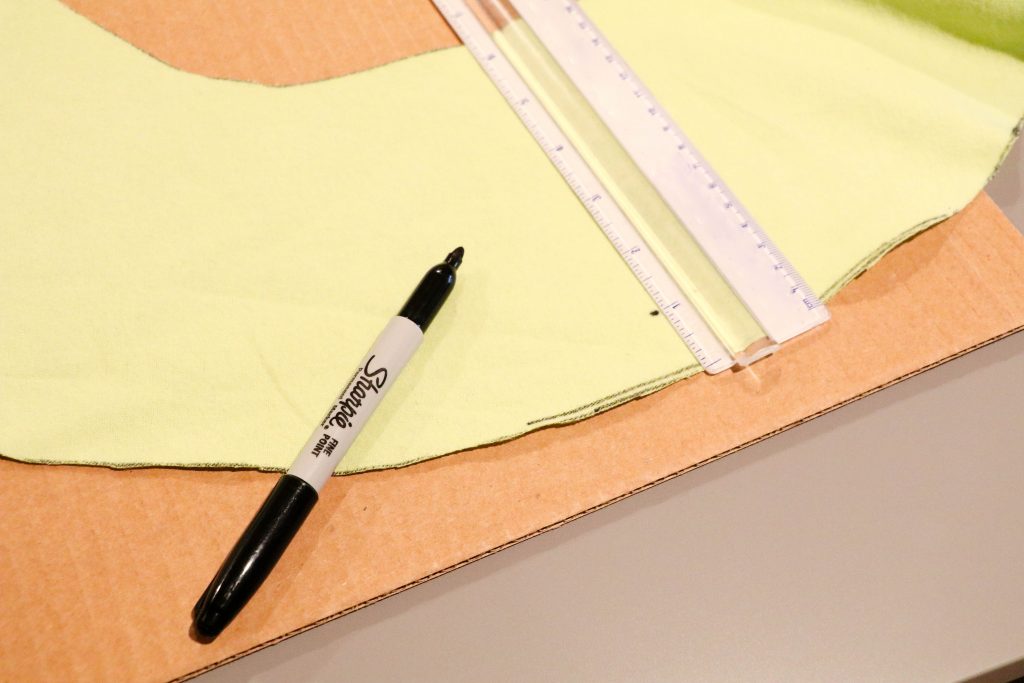
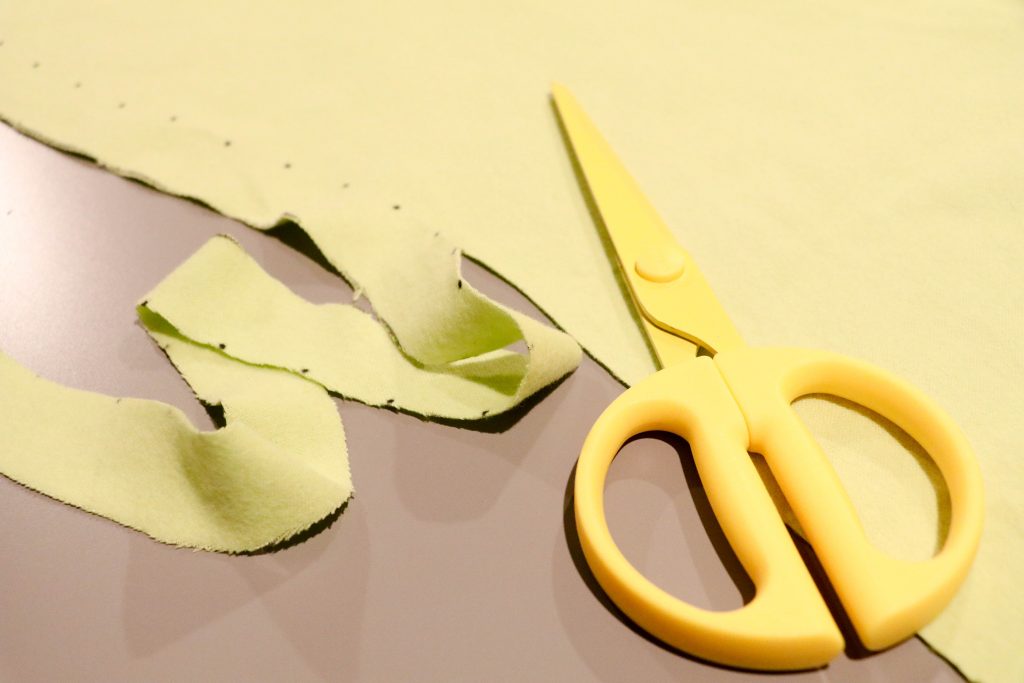
I took my straight-edge ruler and marked dots at 1″ from the edge of the fabric the whole way around it…making sure to do this on the same side of the fabric that had my earlier marker lines on it. Once the dots were in place, I cut the 1″ border off by connecting the dots with my scissors. I then laid this on top of the avocado to make sure ascetically it looked right. Tip: you can always start out taking less off and then more if needed. Much harder to do this in reverse, if you over estimate the border.
Scratch That: Attempt #1 – Let my learnings save you time and money!
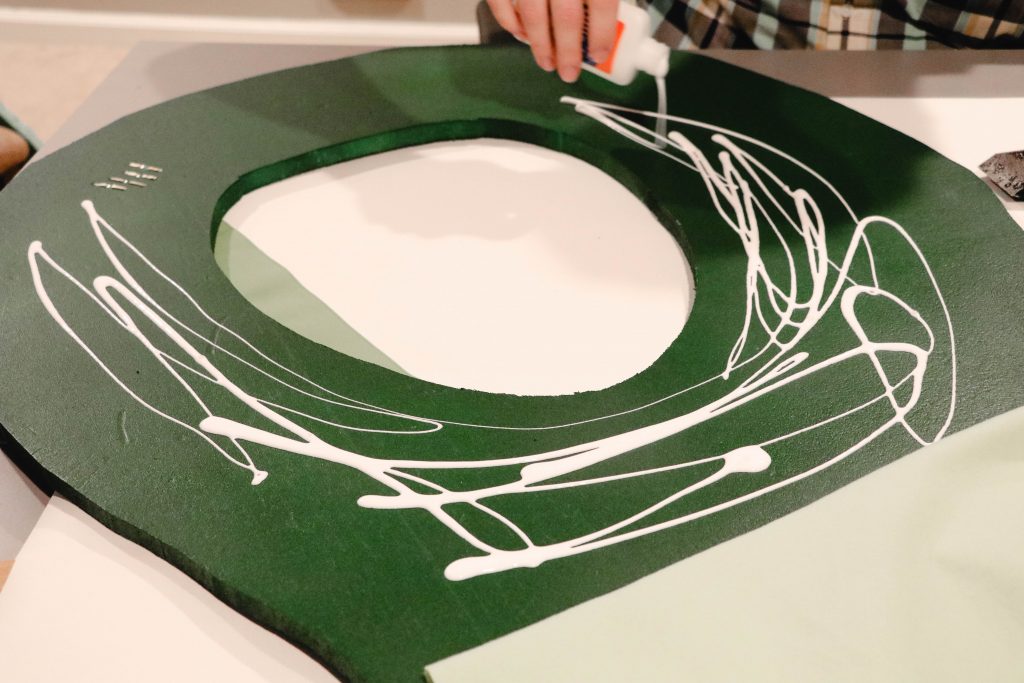
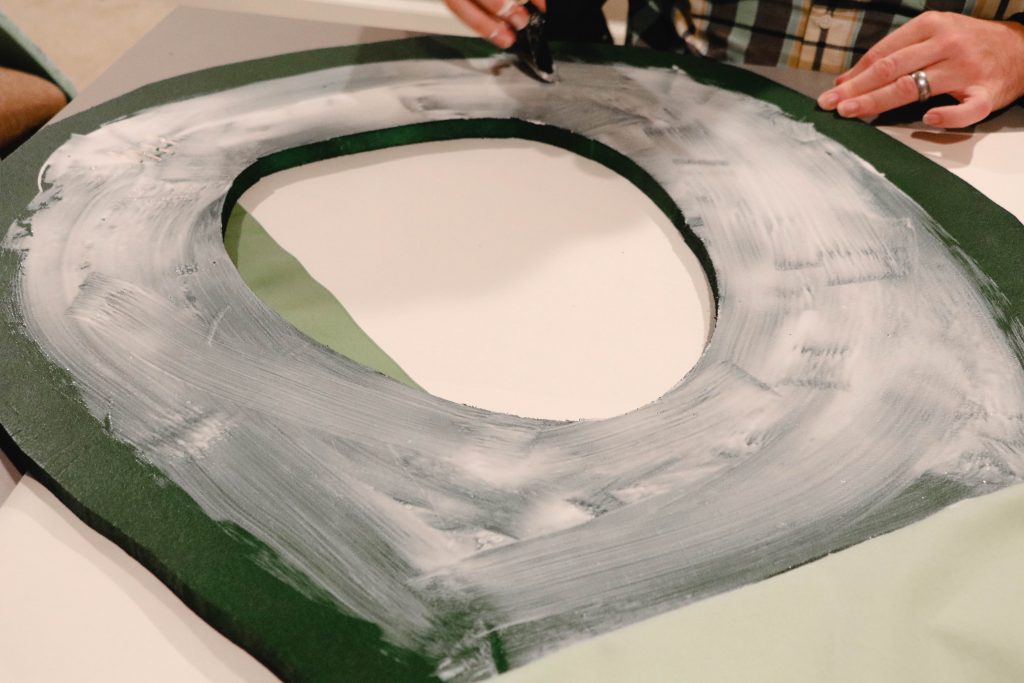
This was with the entire shape cut out, including the two holes in the middle (for the face and the belly).
Once Elmer’s White Glue was added to the border, leaving 1″ of space on the border, we used foam brushes to apply the coat evenly. We adhered the fabric, in a decal fashion, in order to push out the wrinkles as we went. Only problem, the now slightly “wet” fabric was naturally stretching and the center holes no longer lined up with the insulation board. No, no, no!
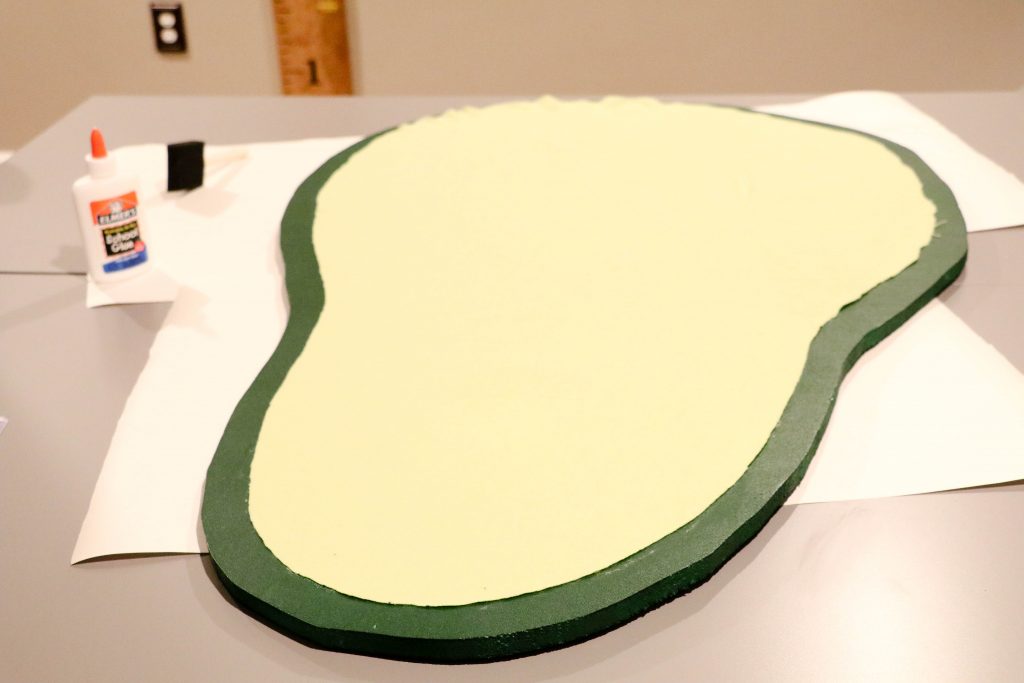
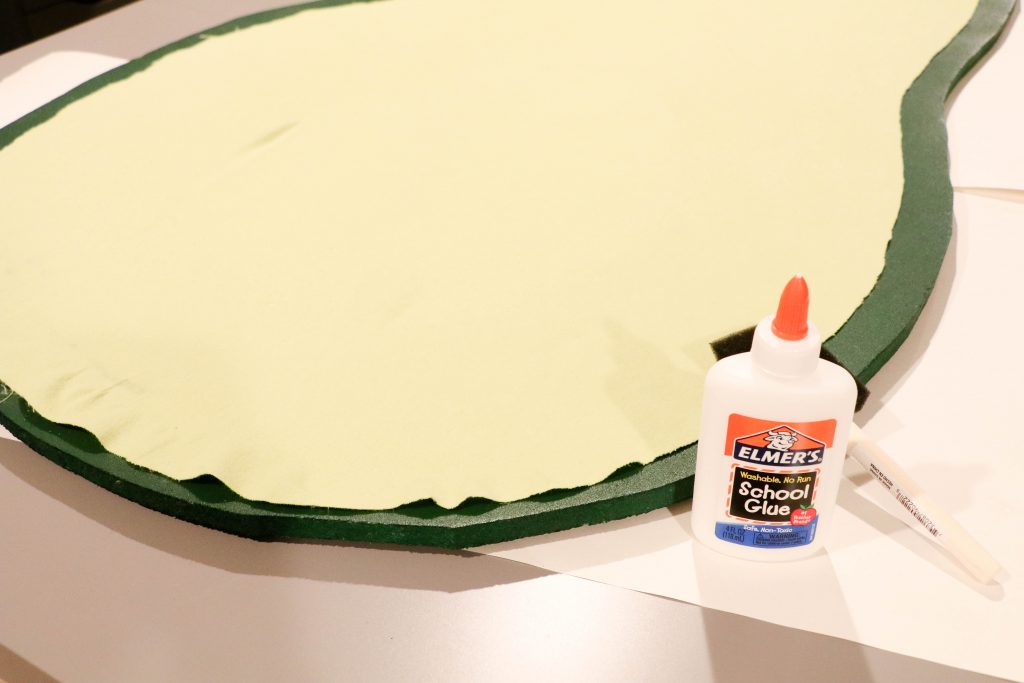
Attempt #2
This time, we used fabric cut out, less the 1″ border, but without inner holes precut in the middle. We would now cut out the inner holes after the fabric was attached with the glue and dry. Went so much better this time. Once the glue had ample time to dry, we cleaned up the edges (any frays and also to make sure the slightly stretched fabric was reduced in areas to make sure the 1″ border carried around), and then cut out the middle two holes, leaving some fabric on the edge to pull through and adhere to the back of the insulation board. Tip: the areas we pressed down rather hard while applying the fabric to the glue, the glue dried through the front of the fabric. Maybe don’t press quite as hard as we did, although I don’t think it looks terrible.
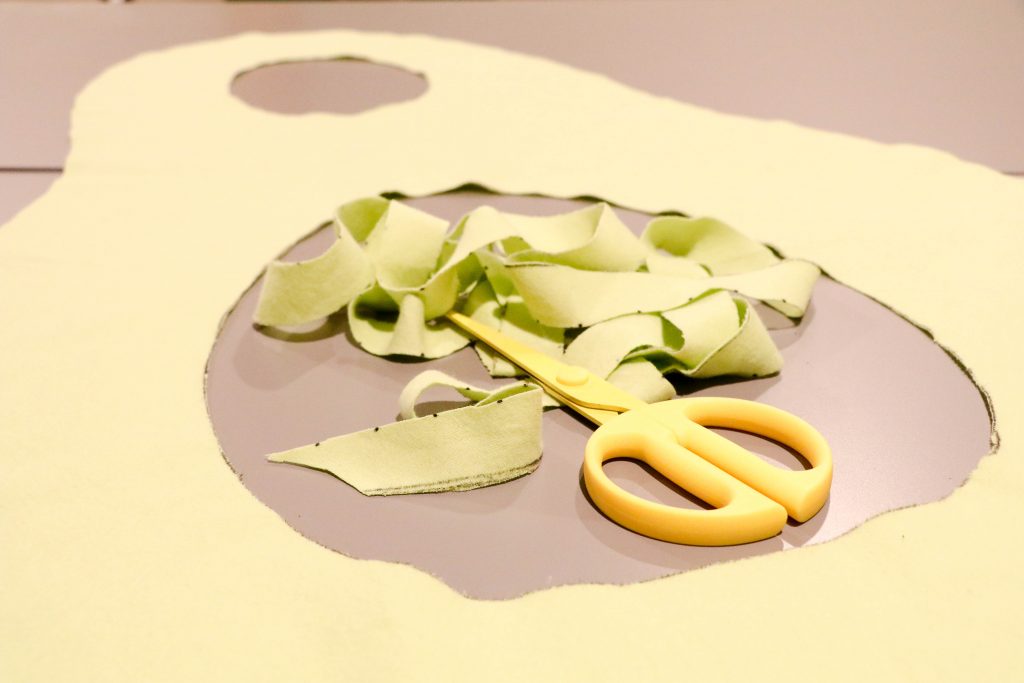
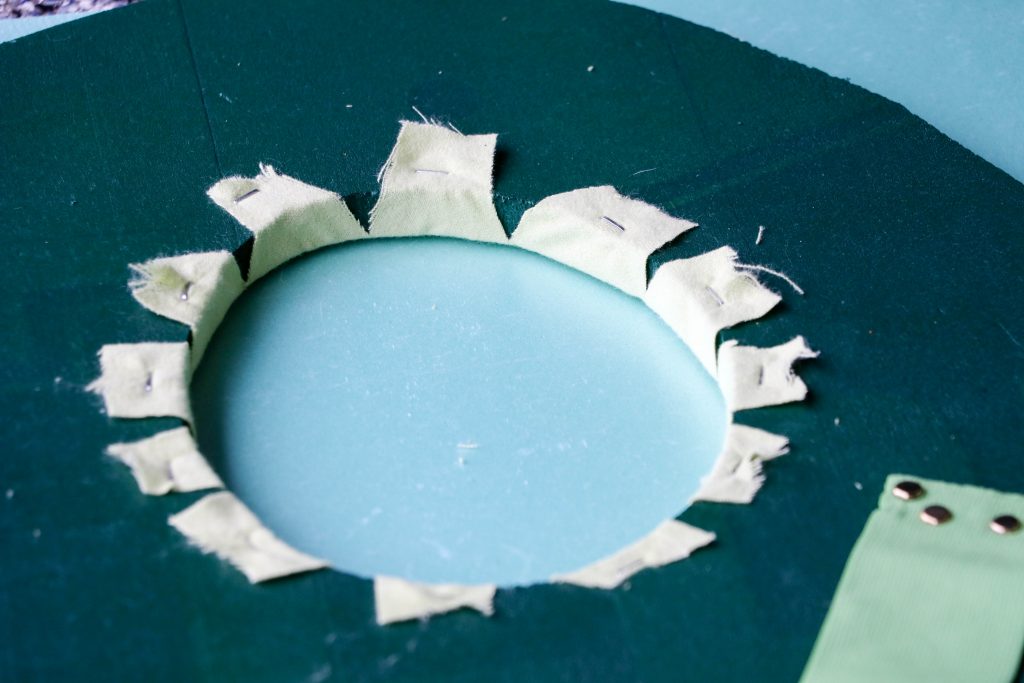
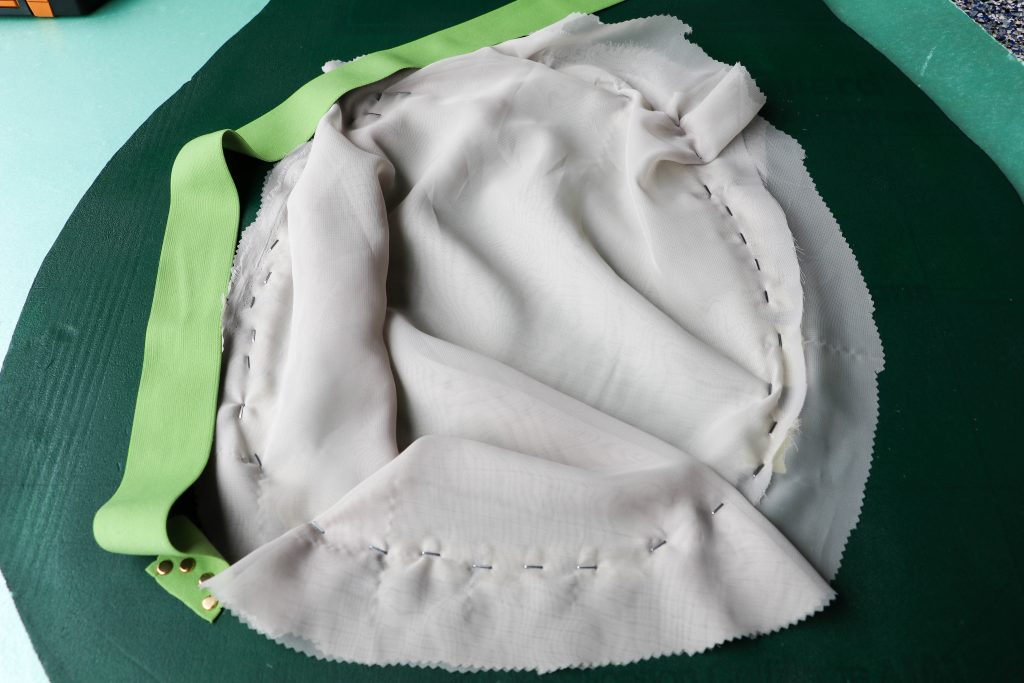
Once a day had passed, we cut out just the dead-center portions of the two inner holes…leaving about a 1.5″ border (and should have probably left 2″). Our thought was to “wrap” the fabric into the inner holes, so the edge of the fabric would appear to “bleed” to the inside of the holes. After leaving this border, we made small slits sporadically around the elliptical shapes, in order to pull the fabric through to the backside.
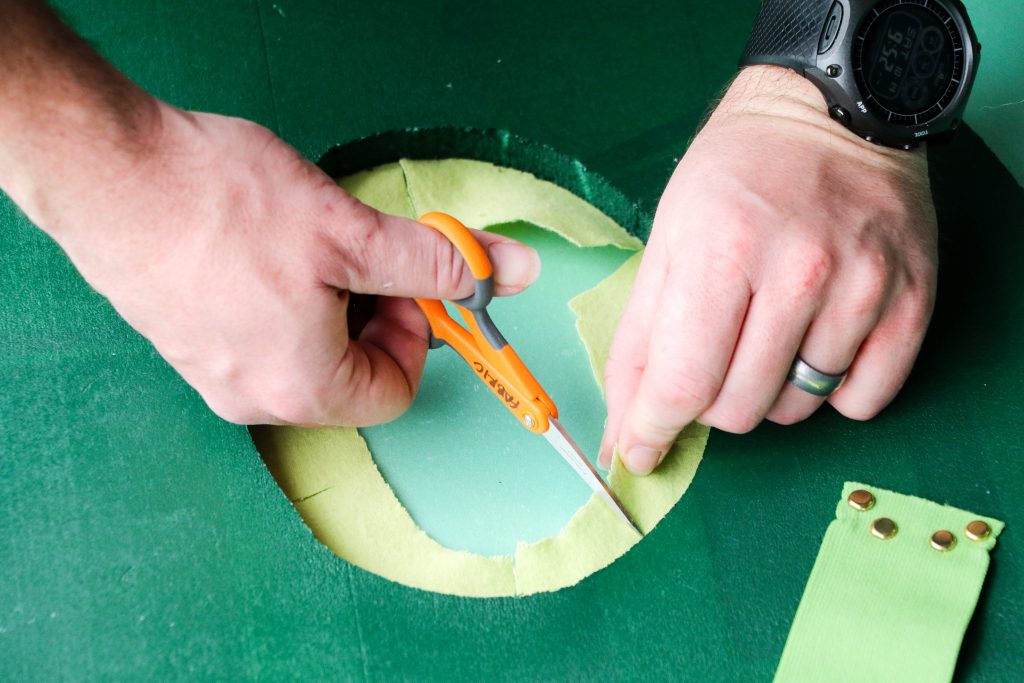
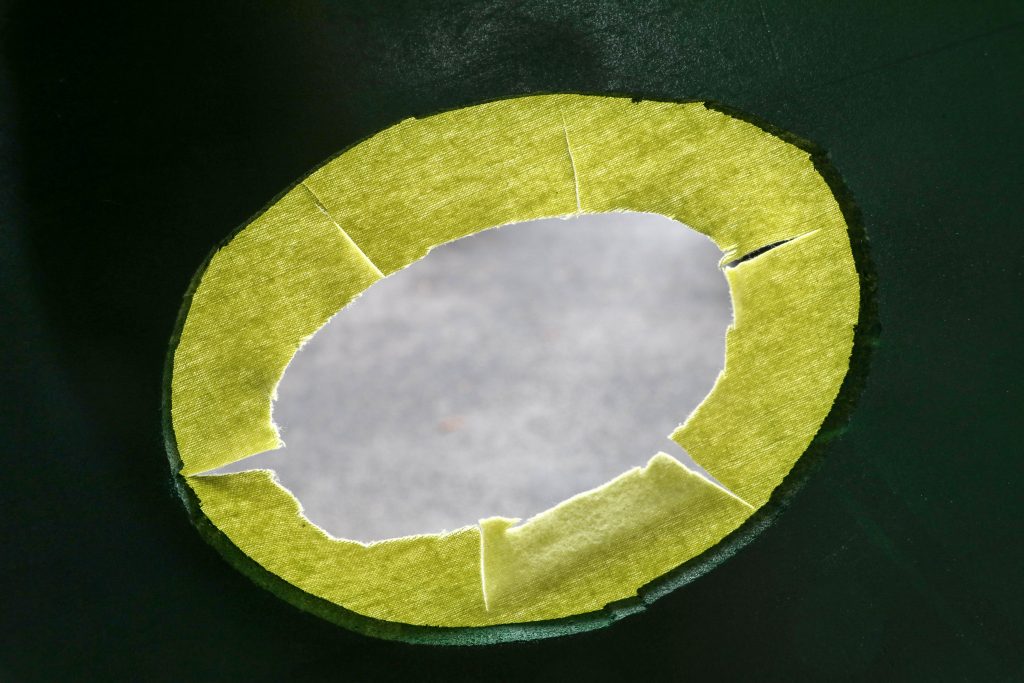
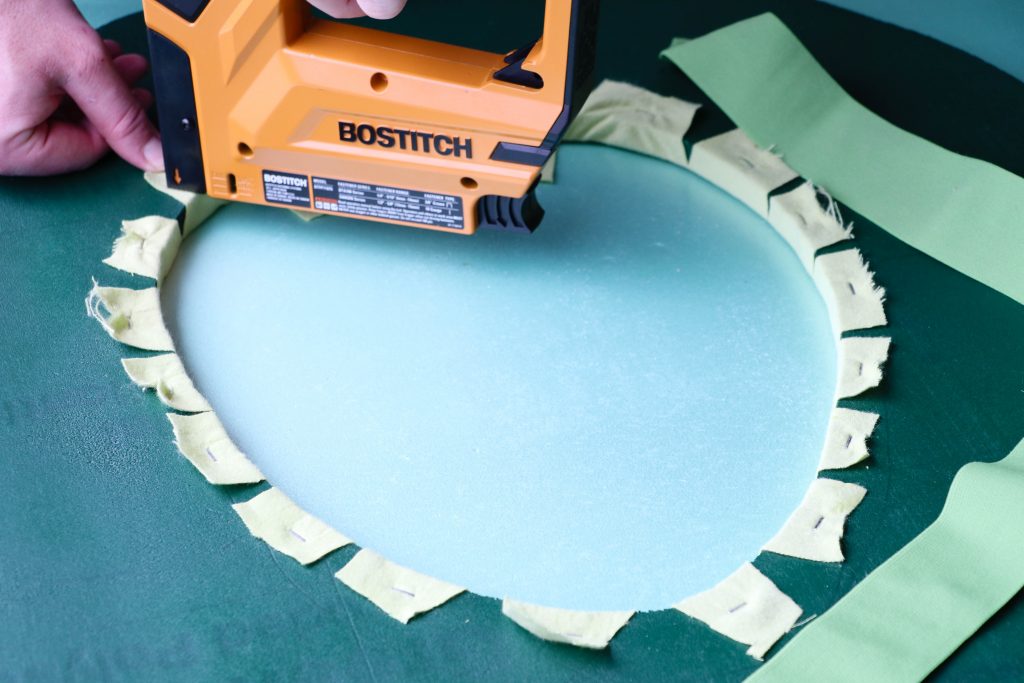
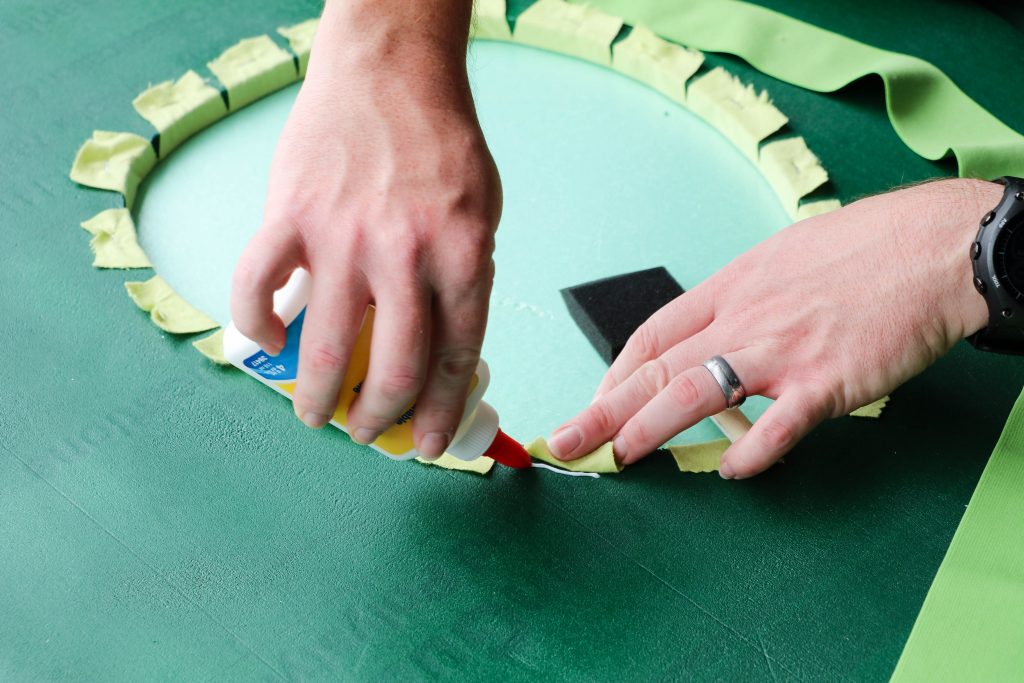
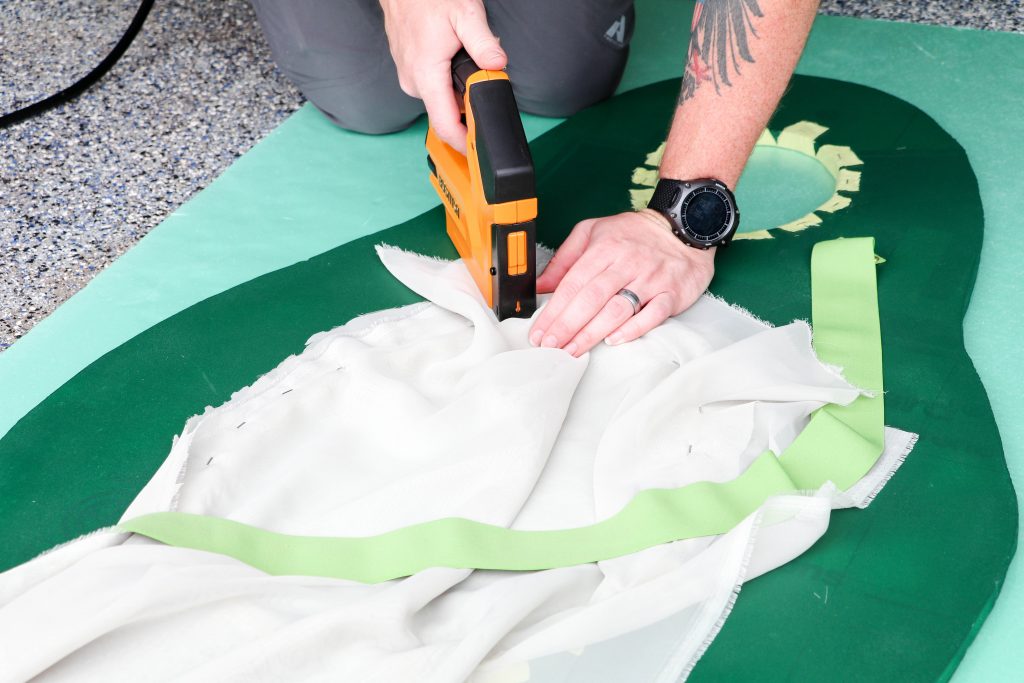
Once the slits were made, we pulled the fabric through to the backside and used a staple gun attached to a compressor to adhere. (We tested the length of a staple and this method on a scrap piece of insulation first). After all the staples were in place, we used pinking shears (where possible) to keep the edges from fraying. This is why I mentioned earlier that a 2″ allowance would have been a bit better. And, then we glued the tips down to hold them in place with white glue.
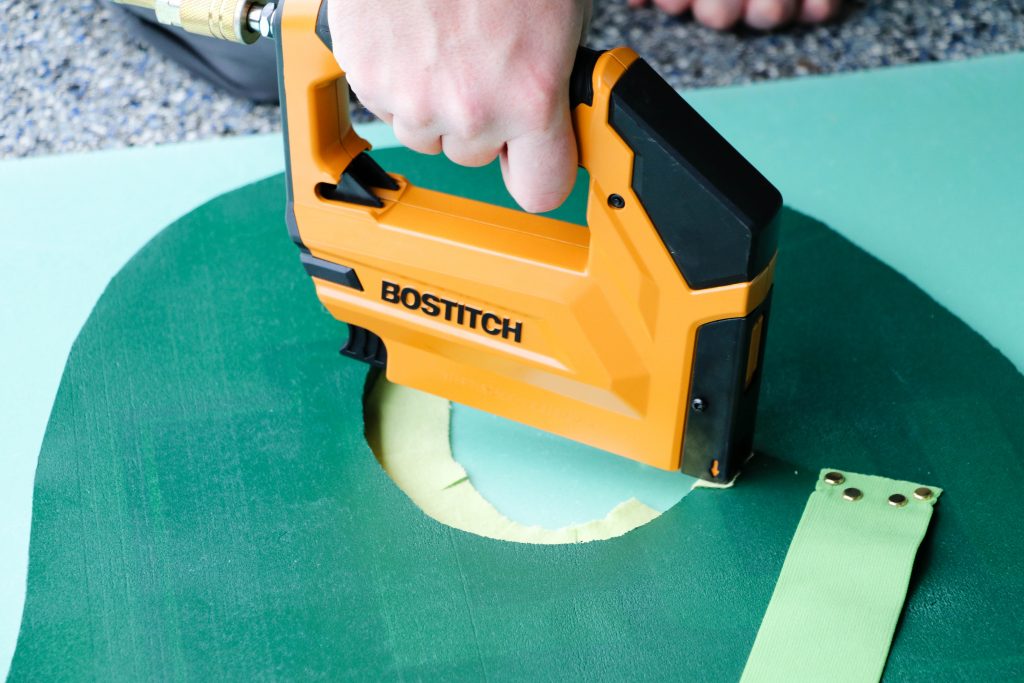
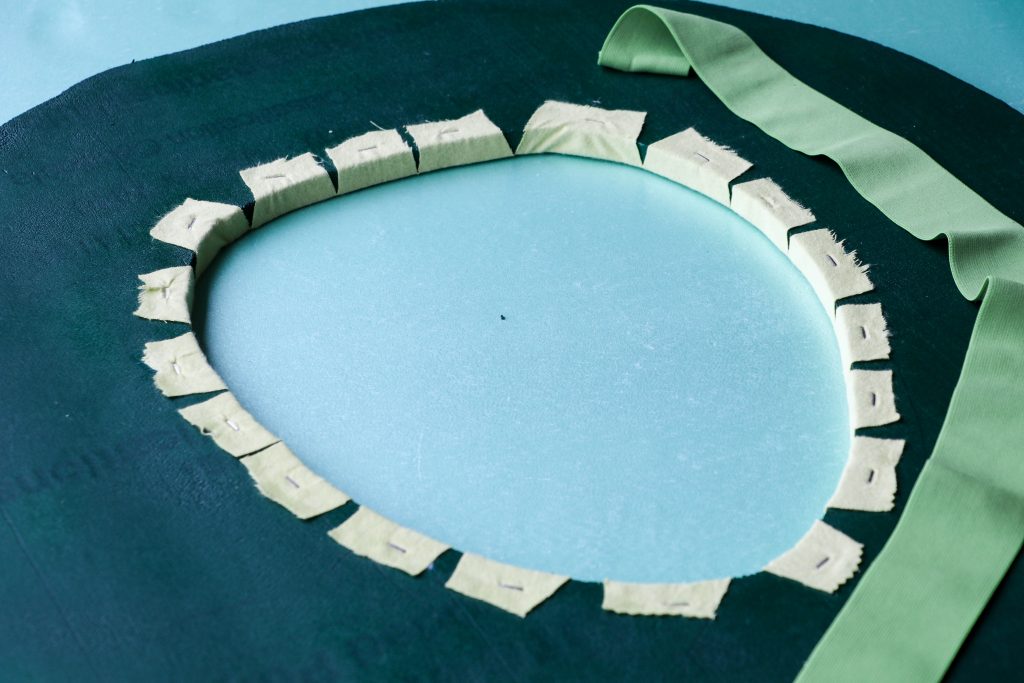
We made sure to staple and glue the flannel fabric before starting on the belly fabric, which would overlap it on the backside. First, I put the costume on, and then determined how much fabric I needed and I ended up cutting the sheer fabric into three, relatively equal widths. We then overlaid these and then stapled them into place, folding nice looking “wrinkles” every so often (at the corners). Every time we would start to staple a new side, I would test the costume out again, to make sure we were leaving enough fabric to accommodate the baby bump. Once the staples were in, we took the pinking shears to the edge of the fabric and then used white glue to keep the fabric from fraying and the staples to stay in place.
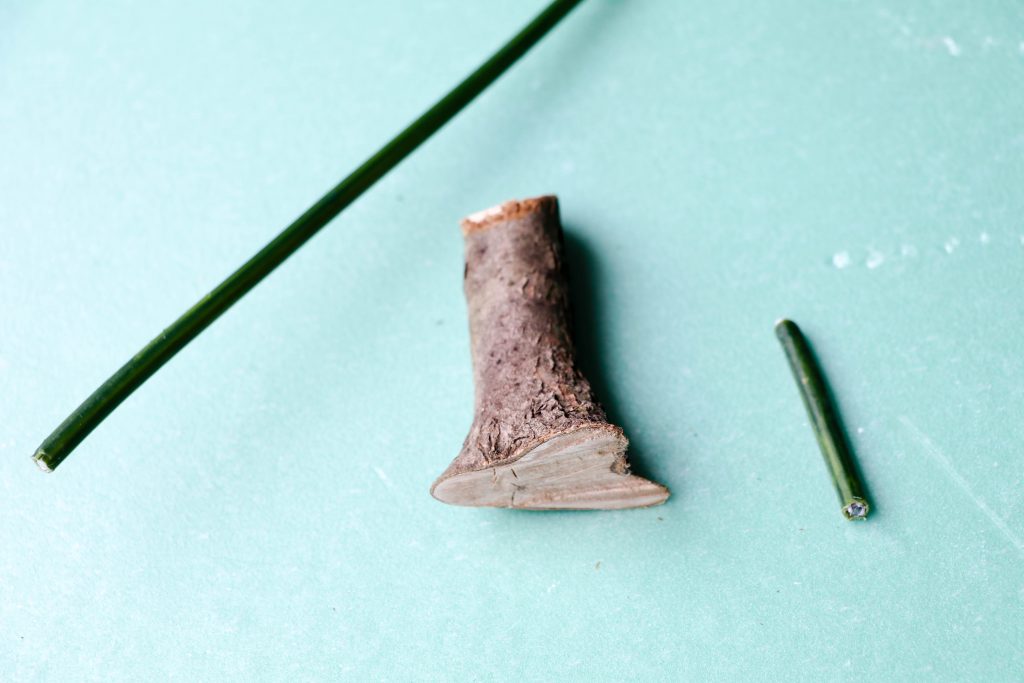
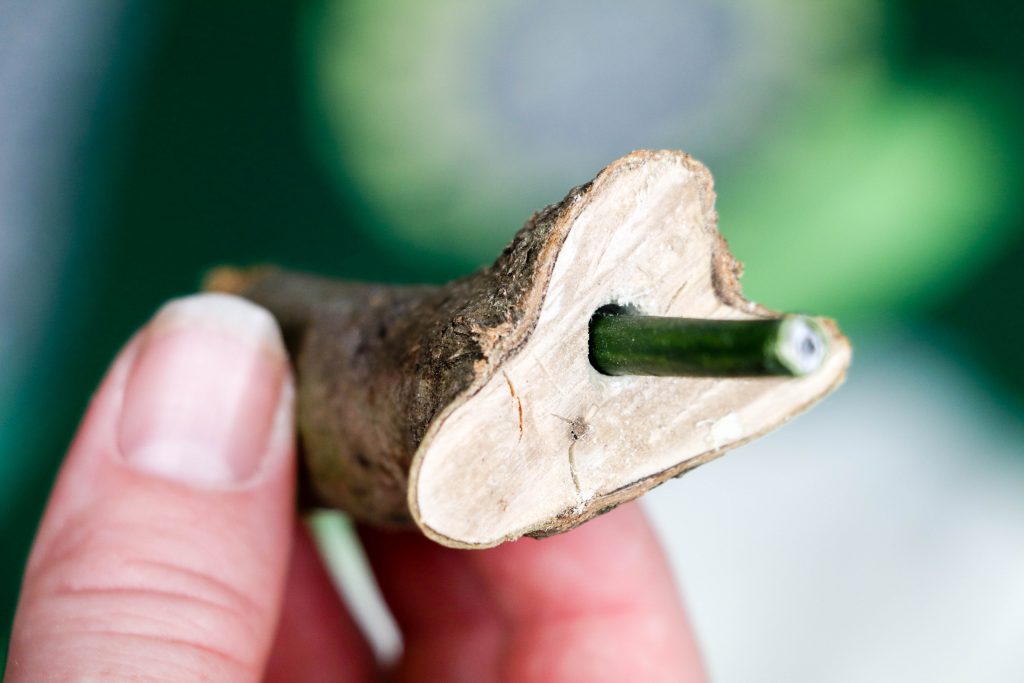
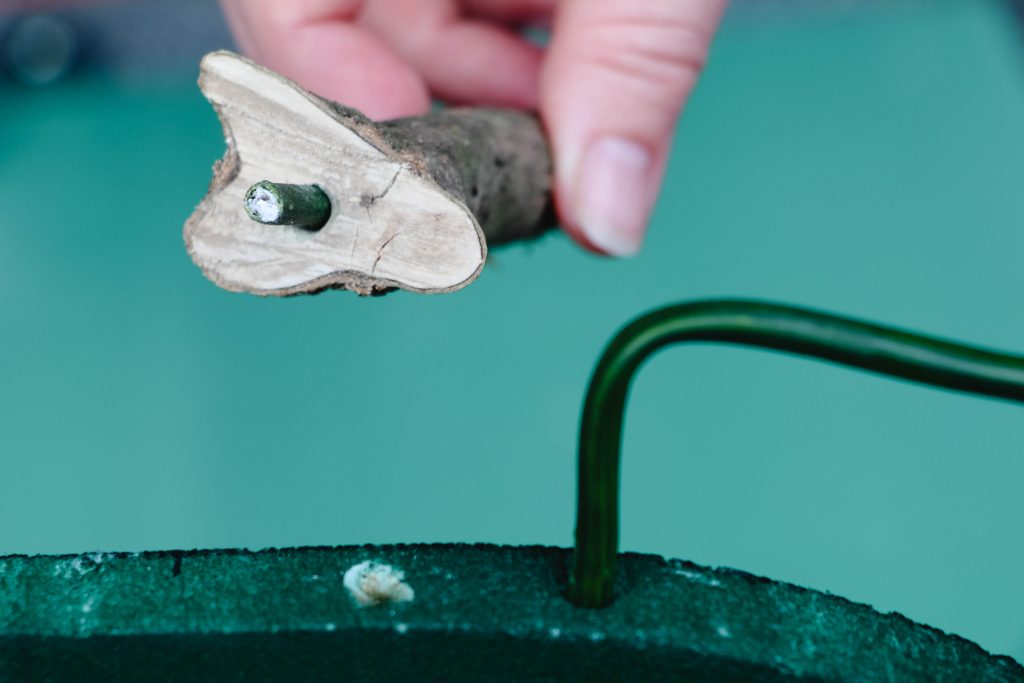
Attaching the Stem & Leaf
And, now we were on to the final stretch. We began by searching in our own backyard for a twig that was approximately 3/4″ thick by 3″ long. Since we had earlier purchased a large faux tropical leaf for the top of the avocado, we decided to use part of the tropical leaf’s stem to help hold the twig in place. We drilled a hole into the twig piece we wanted to use, and also two holes into the top of the board, after testing positioning of the stem and the leaf. We also clipped off excess stem from the leaf, with the diagonal pliers. We used a super glue that would take 24 hours to dry to hold the pieces into place.

And, after the super glue had 24 hours to set…whala…we had a maternity avocado Halloween costume, made from scratch!

Family Costumes Shopping List
In the case where you’re interested in buying the costumes you see my husband and daughter wearing, here’s a shopping list for you.
Hers:
- Etsy.com iheartanalogue Shop: Sriracha Hot Chili Sauce Red Toddler Shirt One Piece BodySuit
- GAP Factory Jersey Pants (Red) (listed as toddler boy item)
- juDanzy 2 Pack of Ribbed Mid-Calf Girls & Boys Socks (as reviewers will say, sizing chart is off, my daughter is 2T and 5.5 toddler shoes and the 6-12m socks fit her best)
- TOMS Kids Unisex Romper Slip-On (Toddler/Little Kid)
- Century Star Kids Boys Girls Knit Cute Cuff Baggy Hip-hop Slouchy Hat Children Basic Beanie Dark Green
His:
Social Follow and Share
New on the blog for Halloween! The making of my 2017 Avocado maternity costume. https://t.co/XD6qtYEcc6 #maternitycostume #halloweencostume pic.twitter.com/gqxveMj2Tr
— Saving Amy (@savingamyblog) October 31, 2017
Saving Amy is a participant in the Amazon Services LLC Associates Program, an affiliate advertising program designed to provide a means for sites to earn advertising fees by advertising and linking to amazon.com.