In this eight-post blog series, I’ll review the step-by-step details on how my husband and I transformed our master bedroom, walk-in closet, and bathroom – all do-it-yourself and with budget-conscious decisions, materials. Follow along from the beginning of our journey to the project completion for inspiration, encouragement, and knowledge that you can put to use.
In the last post, Part 5, we reviewed DIY Upcycled Mantel Headboard. Here, we review DIY Tufted Headboard & Accent Pillows in Part 6. You can easily jump between all parts of the project here:
- Master Bedroom Retreat, Overview: Before & After
- Master Bedroom Retreat, Part 1: DIY Painting Walls
- Master Bedroom Retreat, Part 2: DIY Walk-in Closet Makeover [Video]
- Master Bedroom Retreat, Part 3: Furnishings, Decor & DIY Painting Dresser, Side Tables
- Master Bedroom Retreat, Part 4: DIY Wood Planked Accent Wall
- Master Bedroom Retreat, Part 5: DIY Upcycled Mantel Headboard
- Master Bedroom Retreat, Part 6: DIY Tufted Headboard & Accent Pillows – you’re reading it!
- Master Bedroom Retreat, Part 7: DIY Bathroom Makeover on a Budget
Let’s Get Started with the Tufted Headboard & Accent Pillows
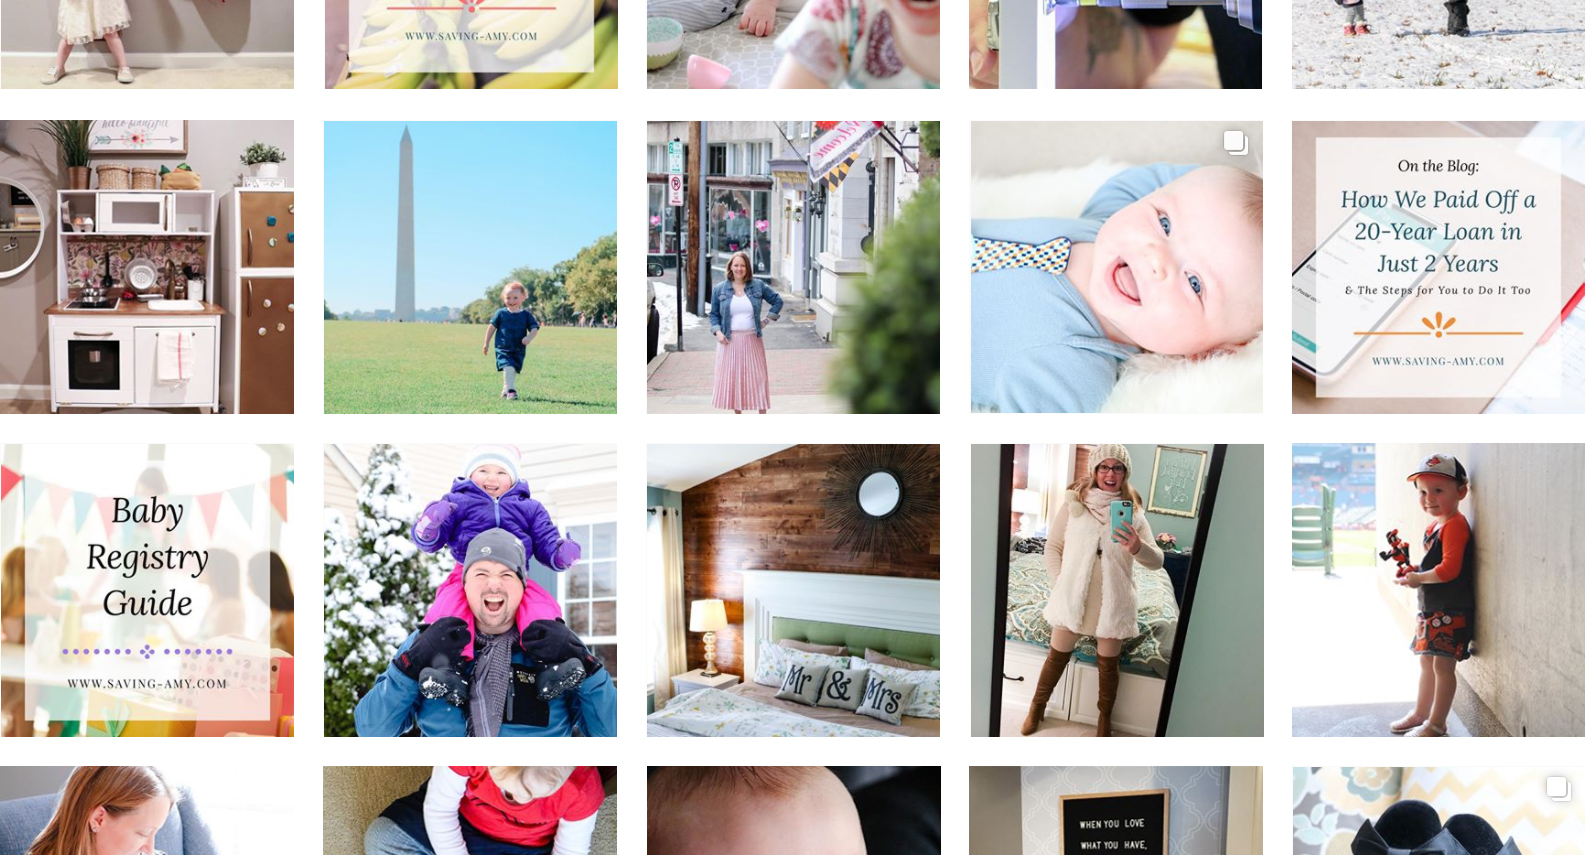
Then began work on the tufted piece. Once the plywood was cut to size, with allowance for fabric on the sides, we lightly painted it white with primer. With some guidance from the Thrifty Decor Chic blog from here forward, we measured out the button locations to drill holes before the tufted piece was to be assembled. We put an inexpensive foam mattress topper, cut to the shape of our board, and several plush layers of batting stretched to the back on all sides, secured in place with staples. Following this, we added a thin cotton layer to the piece, in the same color as the burlap (as to make sure the batting wouldn’t show through the burlap). We then applied the burlap, also with the staples. Next, we took waxed thread and a really, really long needle and one person fed this through the front side and another grabbing it on the backside to secure each DIY button. We started in the dead center and then did opposite corners, ensuring that the fabric was pulled neatly with each button attached. The entire tufted piece was hung on the backer board with two picture hooks. This was assembled this way in case we need to break it down and move it to a later home. Joann Fabric was our go-to place for the batting, the green cotton fabric, the plain buttons, waxed thread, needle, etc. using their weekly coupons on purchases. The light olive green burlap fabric was purchased online at Big Duck Canvas Warehouse, rather inexpensively.


Finally, the room was just not complete without the Mr. & Mrs. pillows, as we had seen in the original Pinterest inspiration photo. Along with my mom’s stenciling & sewing assistance, we DIY those accent pillows too. Found the Harrington typeface online, printed out a “Mrs” and a “&” to turn into stencils (the Mr can be done by covering up the “s” in the stencil to reuse). Also added a blue linear border around the edges to tie in the colors. They are closed in the back with wooden buttons.
Next up: Master Bedroom Retreat, Part 7: DIY Bathroom Makeover on a Budget – freshening up a dark and dated space.